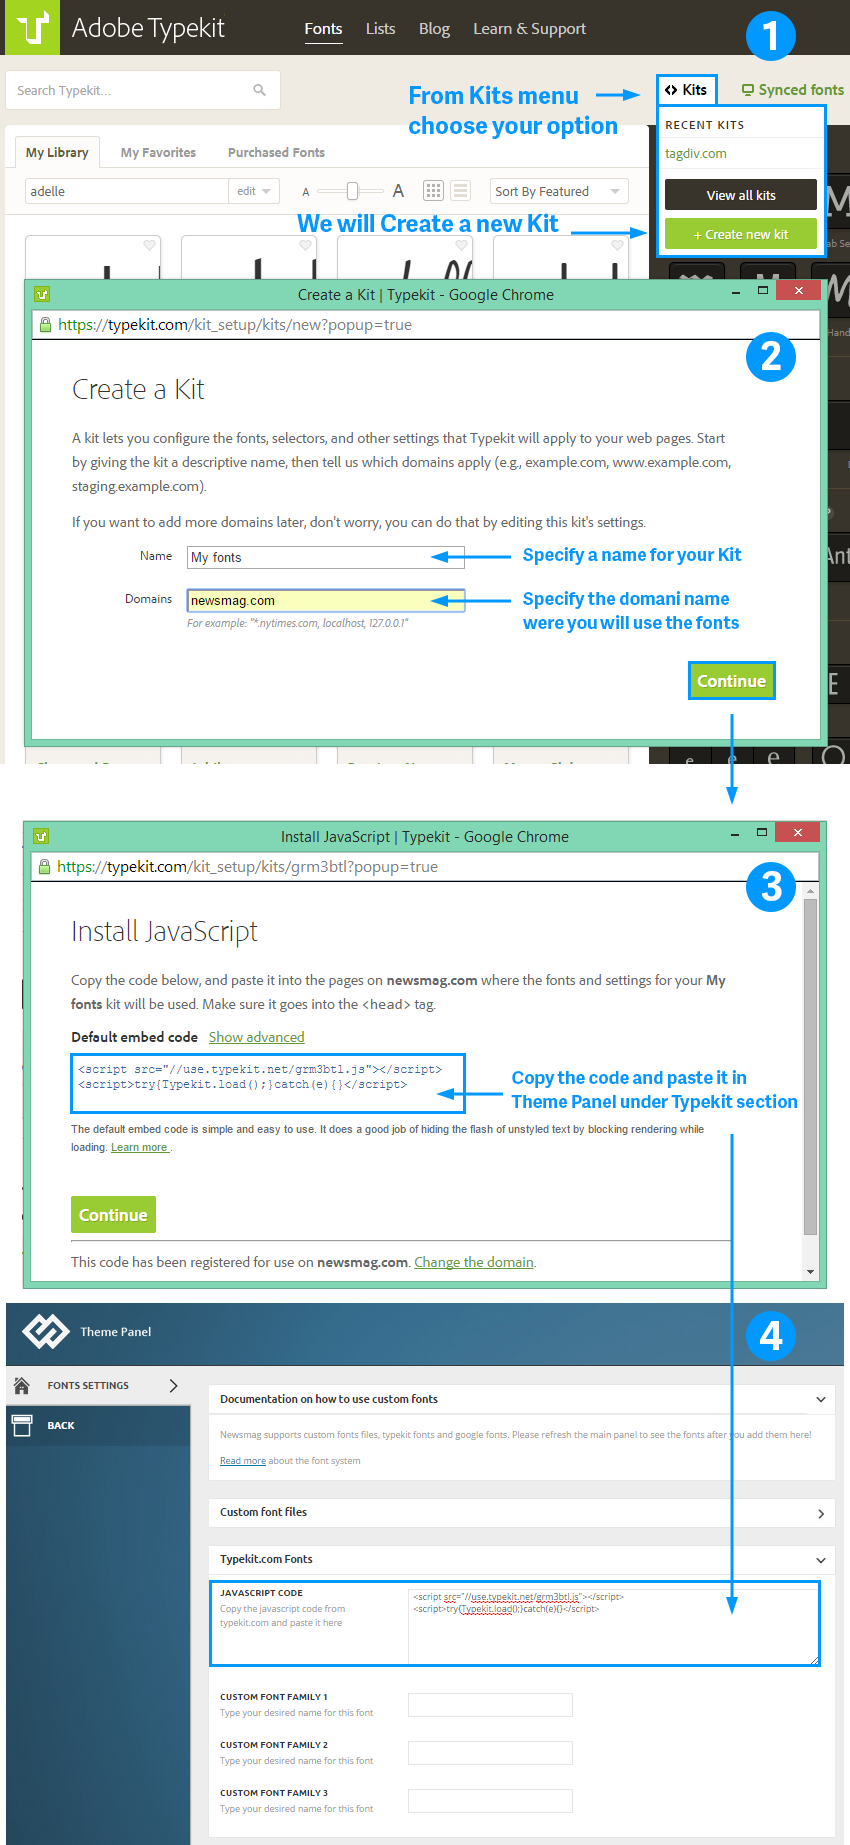
Create an account on typekit.com.
1. From the Kits menu, select Create new Kit.
2. In the new pop-up menu:
- Specify a name for your Kit.
- Specify the domain name where you will use the font.
- Press the Continue Button.
3. From the next pop-up, copy the JavaScript code.
4. Go to Theme Panel > Theme Fonts> Add Custom Fonts.
- In the Font Settings panel, go to Typekit.com > Fonts.
- Paste the JavaScript code that you copy from the Typekit website.
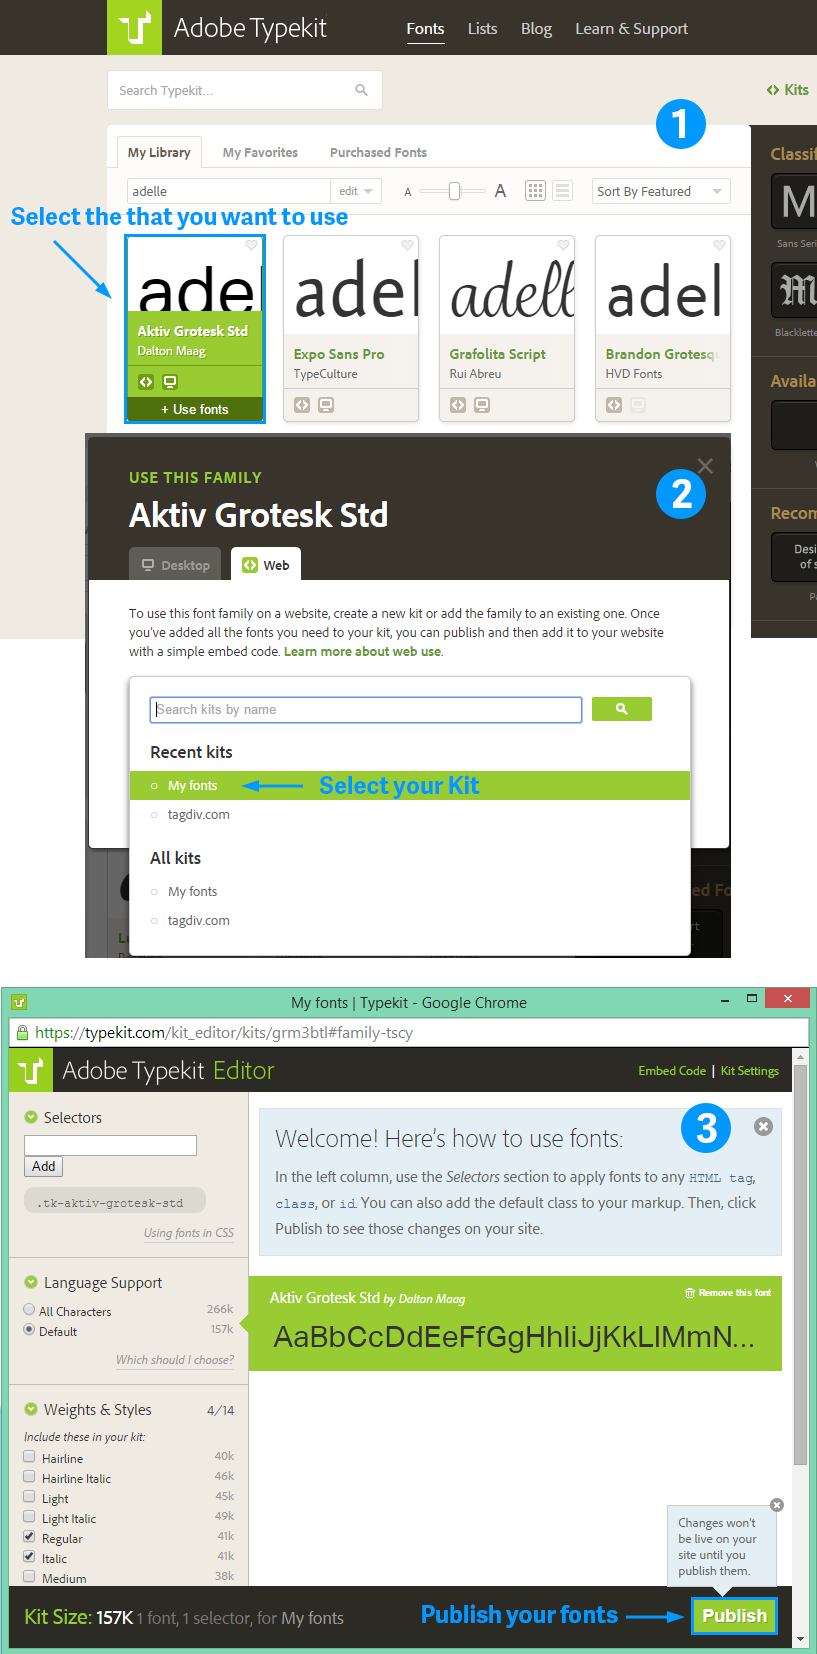
Add Fonts to your Kit
1. From the Typekit Library select the fonts that you want to use.
2. In the pop-up window, choose your Kit.
3. In the new pop-up window, press the Publish button.
Now that you have the fonts, you just need to include them in the Theme Panel.
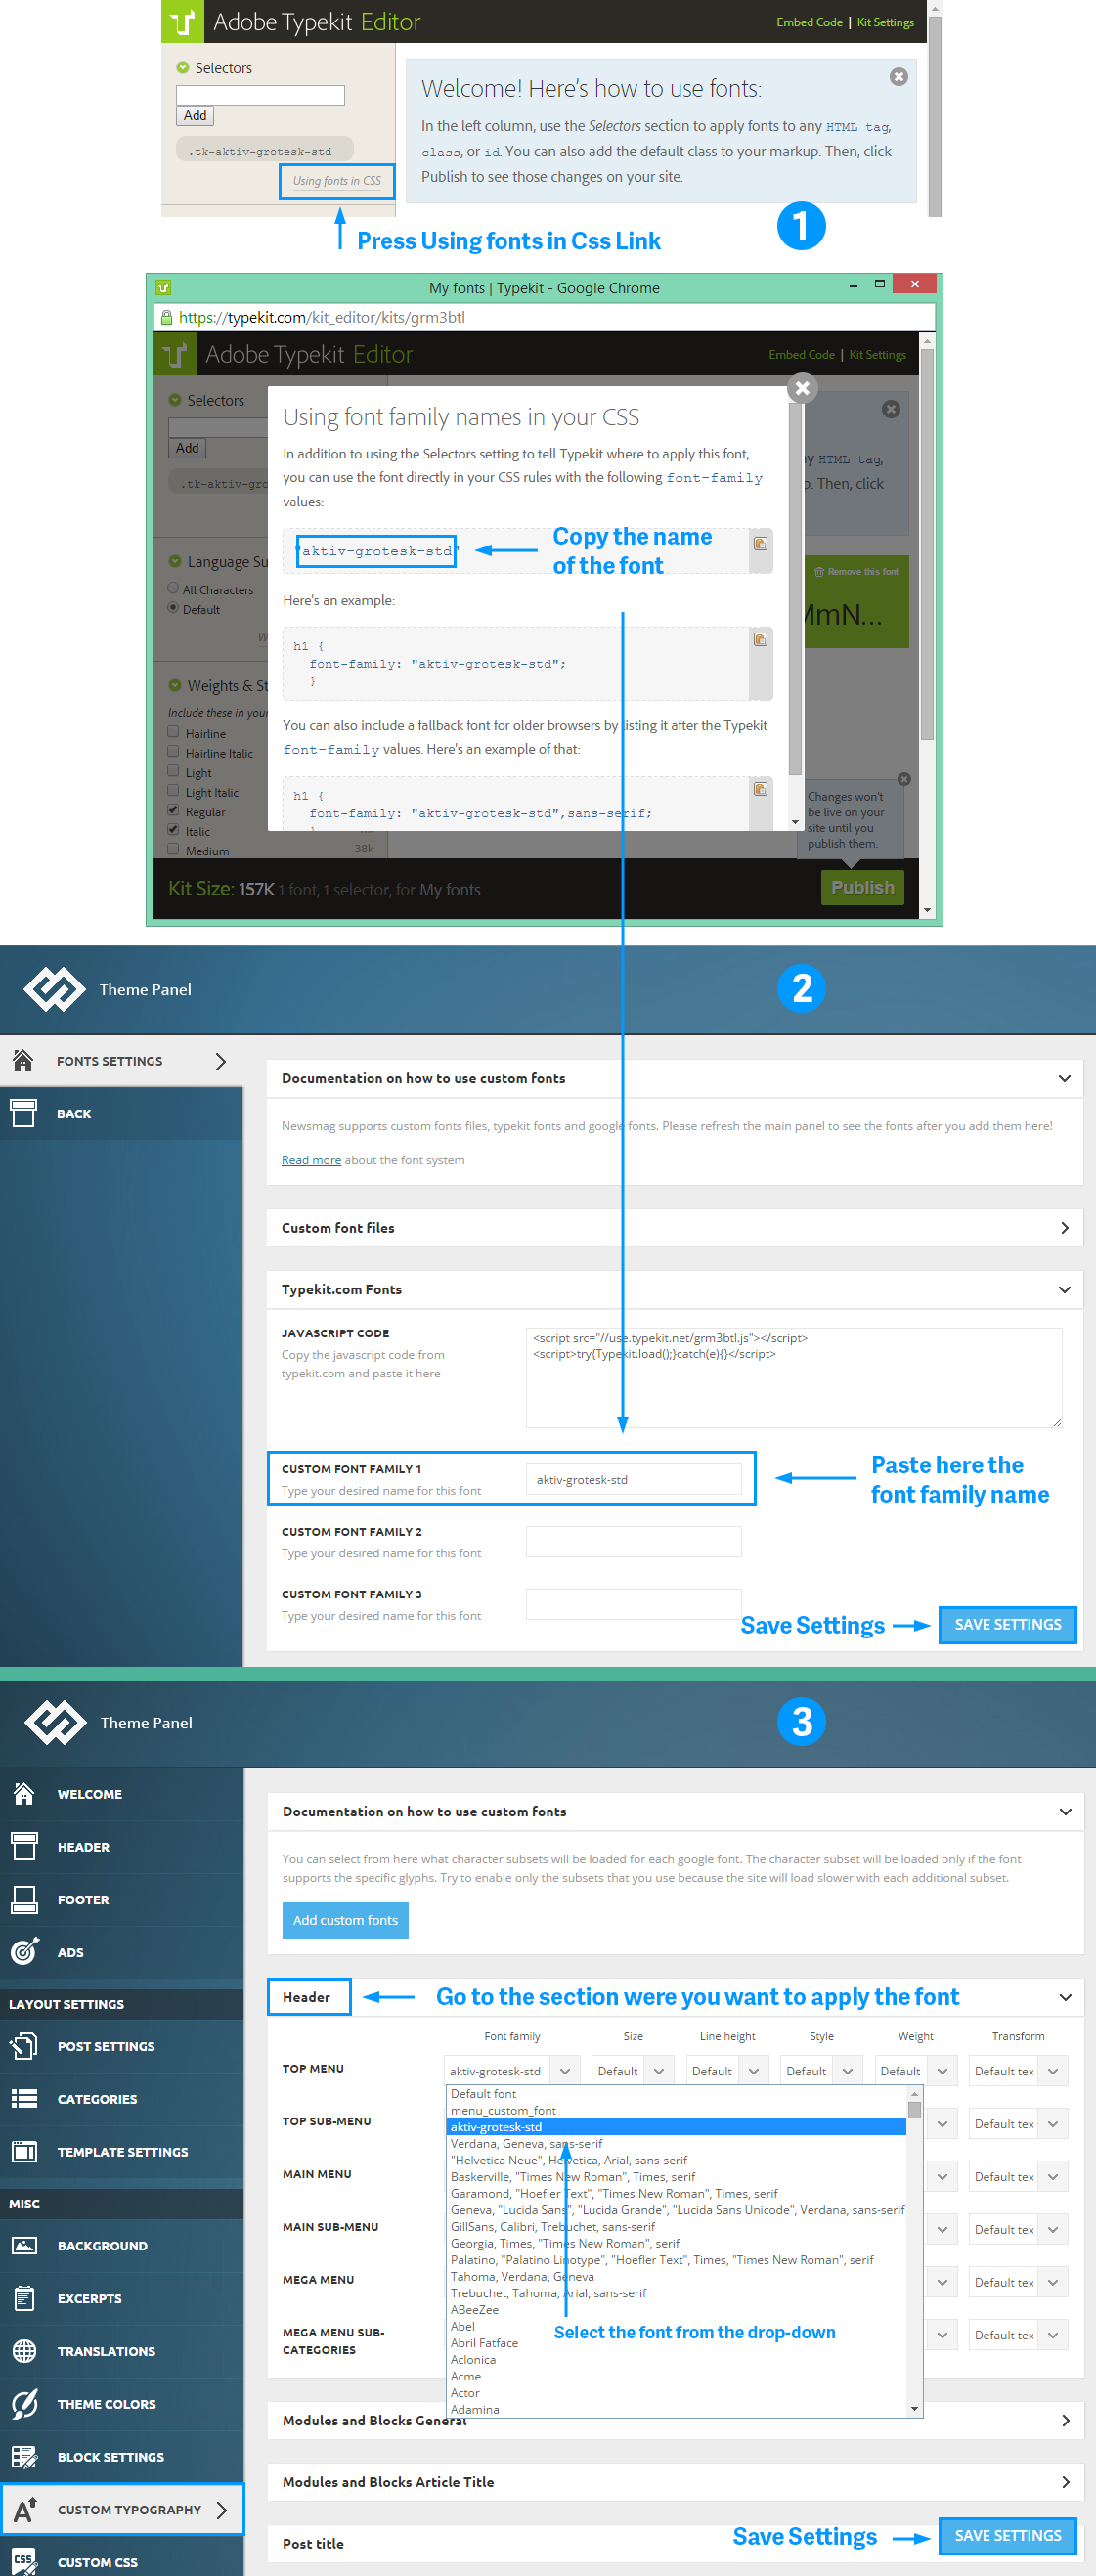
1. In the Typekit Editor pop-up window:
- Press Using fonts in CSS link.
- From the pop-up window copy the name of the font.
2. Go to Theme Panel > Theme Fonts> Add Custom Fonts.
- In the Font Settings panel, go to Typekit.com Fonts.
- Paste the font family name in the required filed.
- Save Settings.
3. Go to Theme Fonts and select the section where you want to apply the custom font.
- You will find your custom font under the Font Family drop-down for each sub-section.
- Save Settings.
You should now see the font being applied on your website.