The theme auto detects the default Google AdSense and the custom banners that respect the structure provided in the documentation and makes them responsive automatically. Each ad spot has one box where you can insert your ad code. Please read below how to set up a Custom ad.
You can define 5 different custom ad spots. You can use the tagDiv Ad Box widget to place each of the custom ads wherever you want on your page.
Using special Custom ad spots
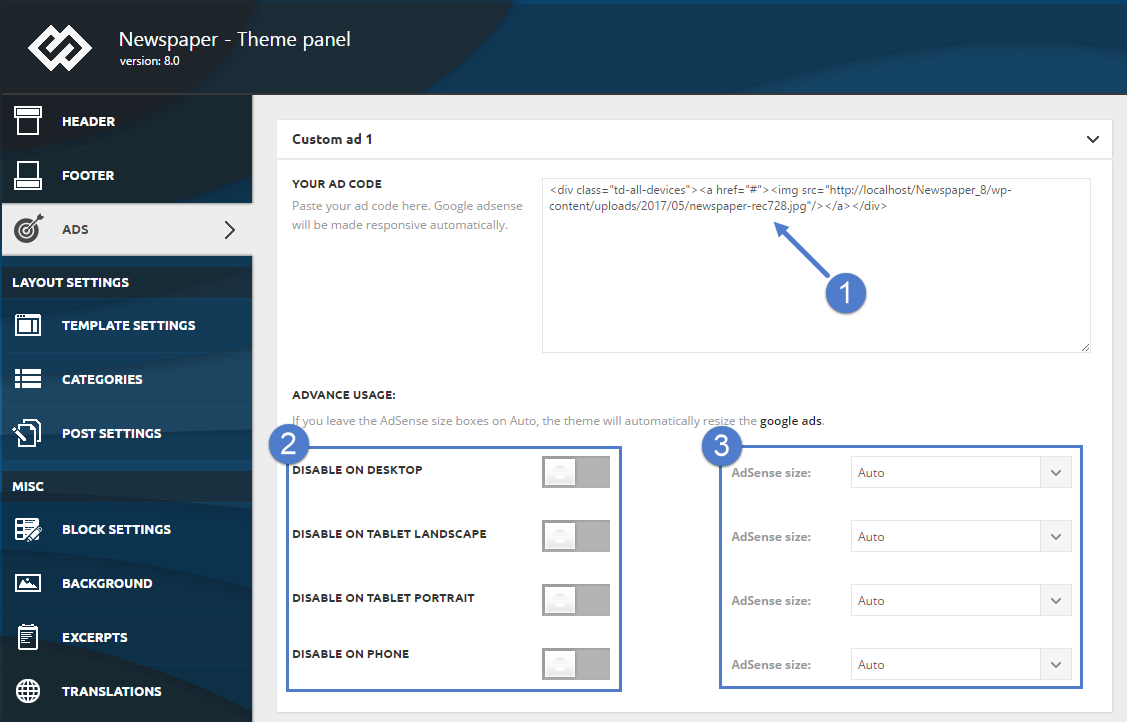
To create a Custom Ad go to Newspaper > Theme Panel > Ads and open the Custom ad Section you desire (one of the 5 available in the Theme panel).
Step 1 – Add your AdSense code to the required area.
Step 2 – Choose if you want to deactivate your AdSense on different devices.
Step 3 – Specify the size of AdSense for different devices or leave it to Auto and the theme will automatically resize the AdSense.
After you finished customizing the Custom Ad click on the Save Setting button.
After you defined the custom ad spots use them via:
A. Using the tagDiv Composer page builder and integrate ads in pages.
You can now create your own custom ads and implement them as easy as it sounds ! This new AdBuilder allows you to create your custom ads. You can create custom image ads for each view ( Mobile, tablet, etc. ) In order to deliver the best quality for your visitors. Also you can insert affiliate codes faster now using the Custom Ad option of the block.
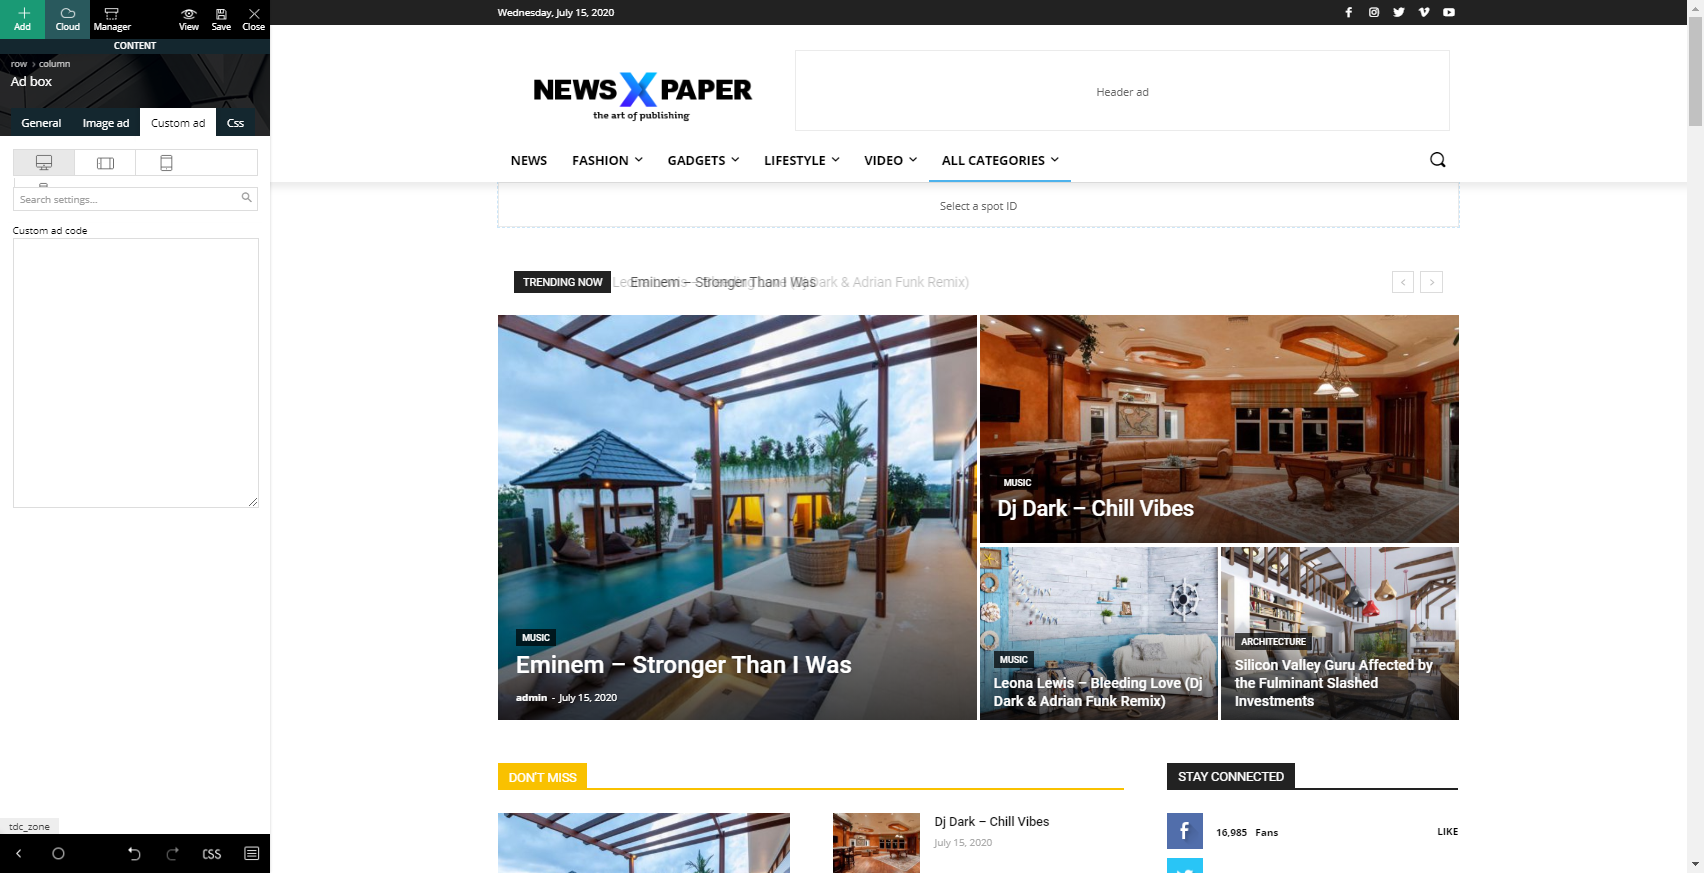
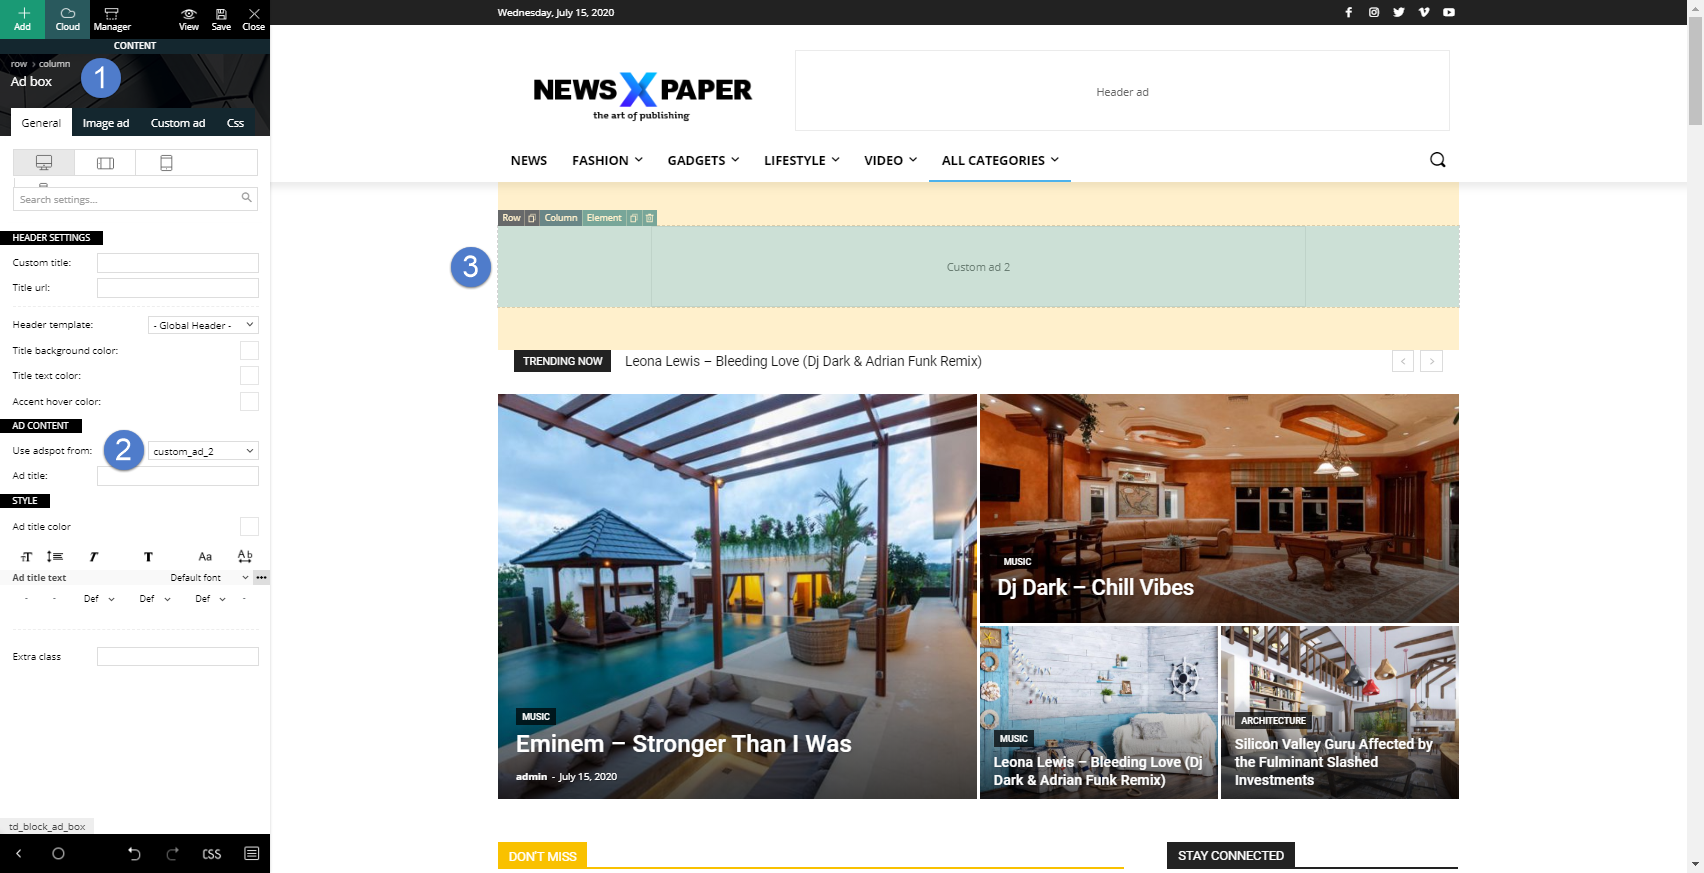
- Step 1 – Edit your page in the tagDiv composer and place an ad box element on your page
- Step 2 – From the element settings select your custom ad spot that you created before in the Theme panel and Save changes.
- Step 3 – Move the element where you want it to be positioned on the page.
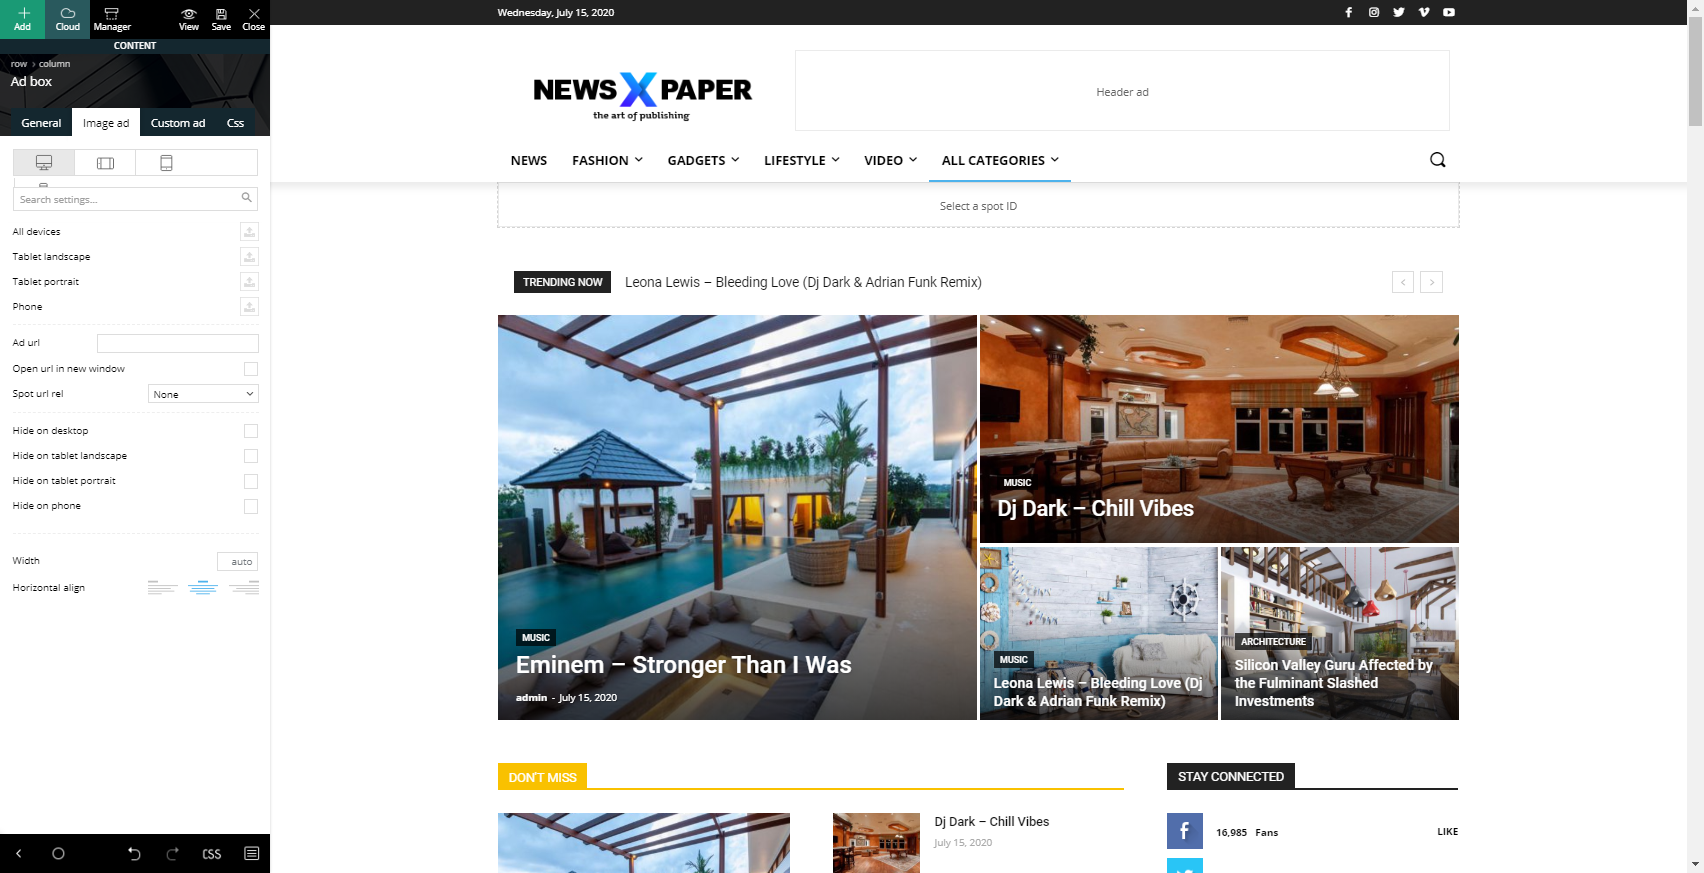
- Step 4 – Choose the type of post ( Image Add or Custom Add ) and configure it.
- Step 5 – Save the changes and enjoy your new ads.
B. Widget in sidebar area
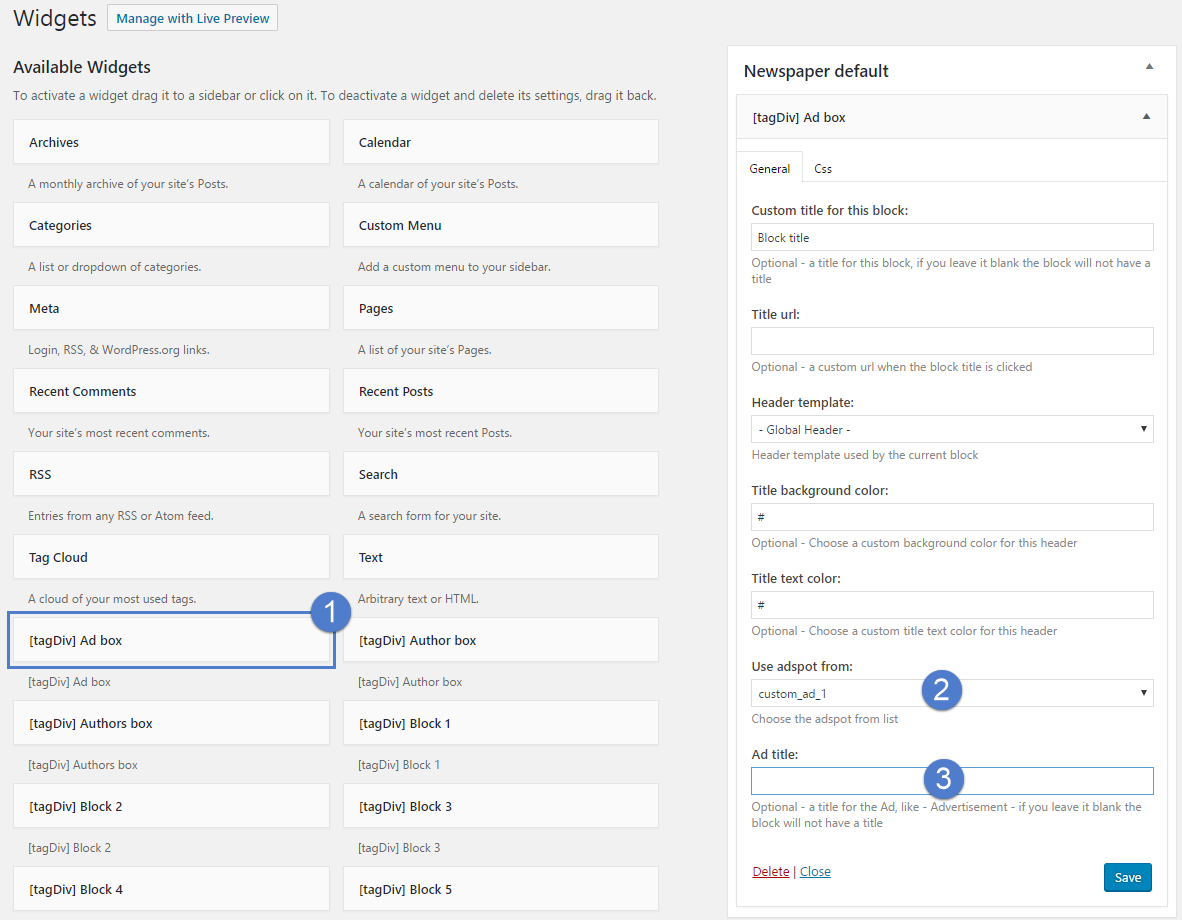
- Step 1 – Go to Appearance > Widgets and add [tagDiv] Ad Box in the desired location (Footer1, Footer 2, Footer 3 or Sidebar area).
- Step 2 – Select the custom ad you have previously created.
- Step 3 – Choose a title for you ad block.
Remember to click the Save Settings button.
This is an example of how the Custom ad can look on your page. The banner was added using the tagDiv Composer builder method illustrated above.