
Now, your users can submit posts and custom post types on the front end of your website. You can create your own form using the shortcodes provided by TagDiv Composer:
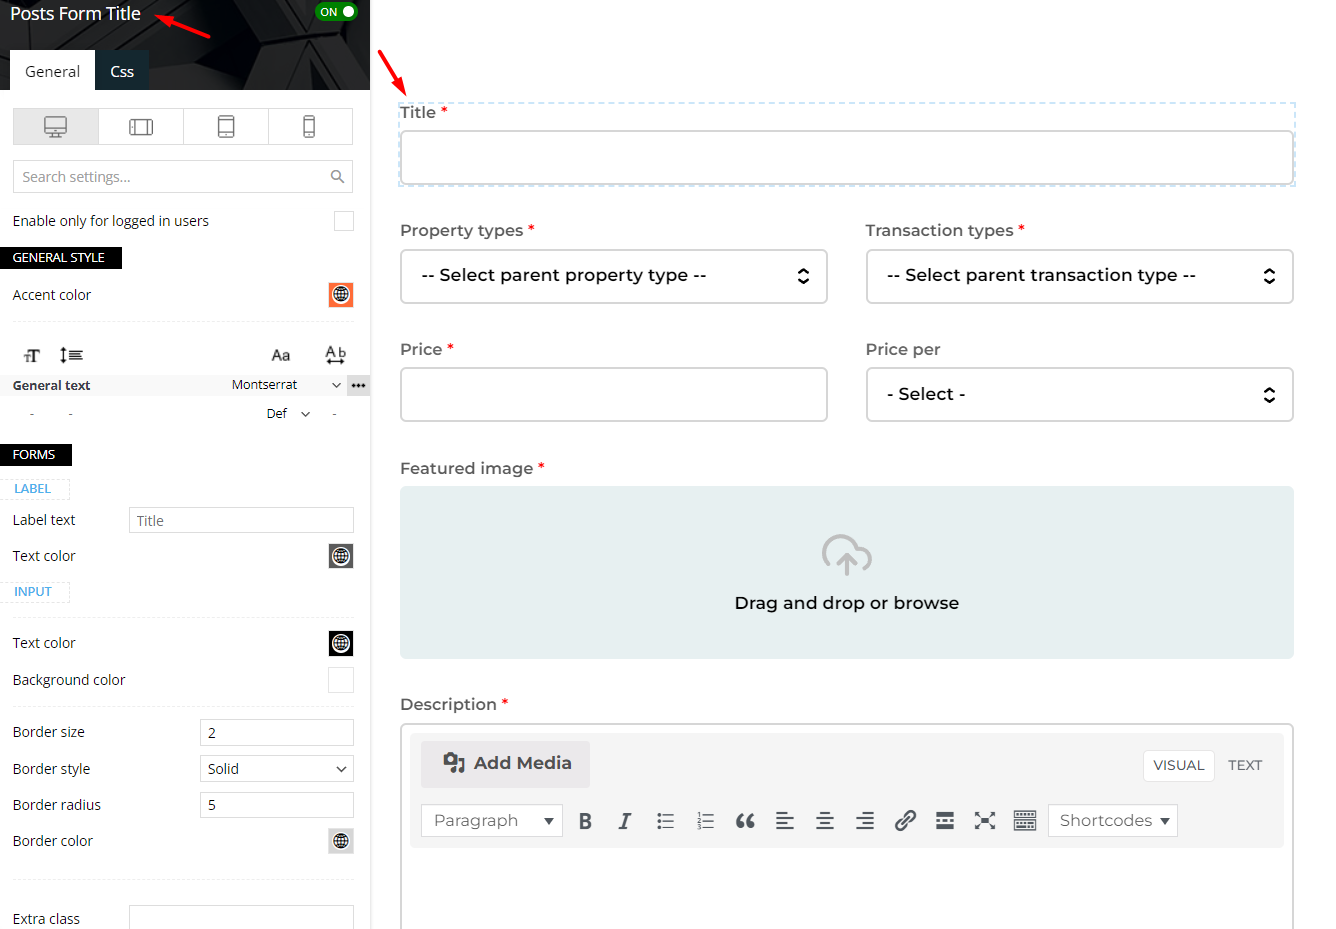
- Posts Form Title: Customize the article/CPT title.
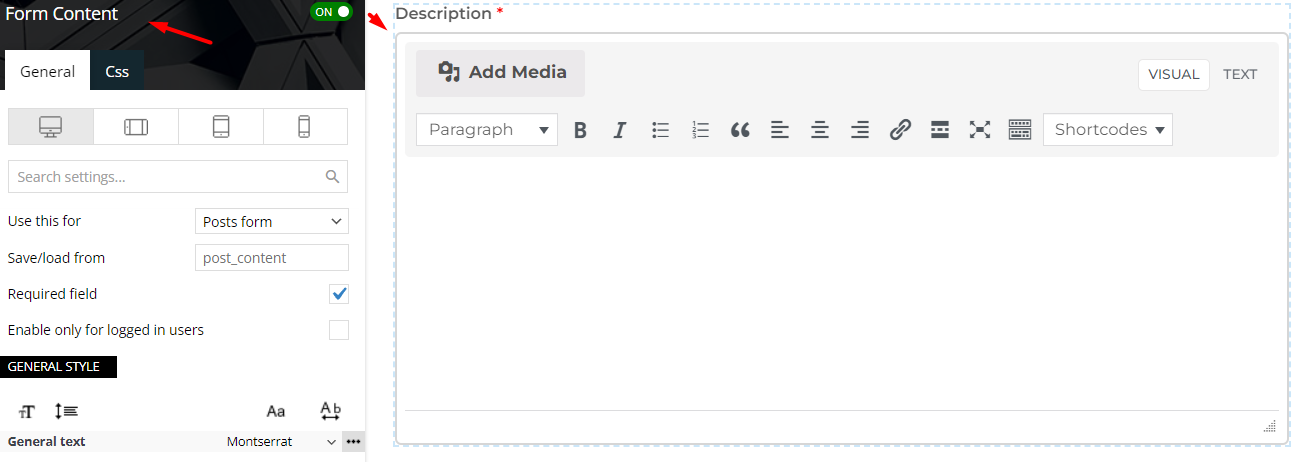
- Form Content: Add text to the article/CPT content.
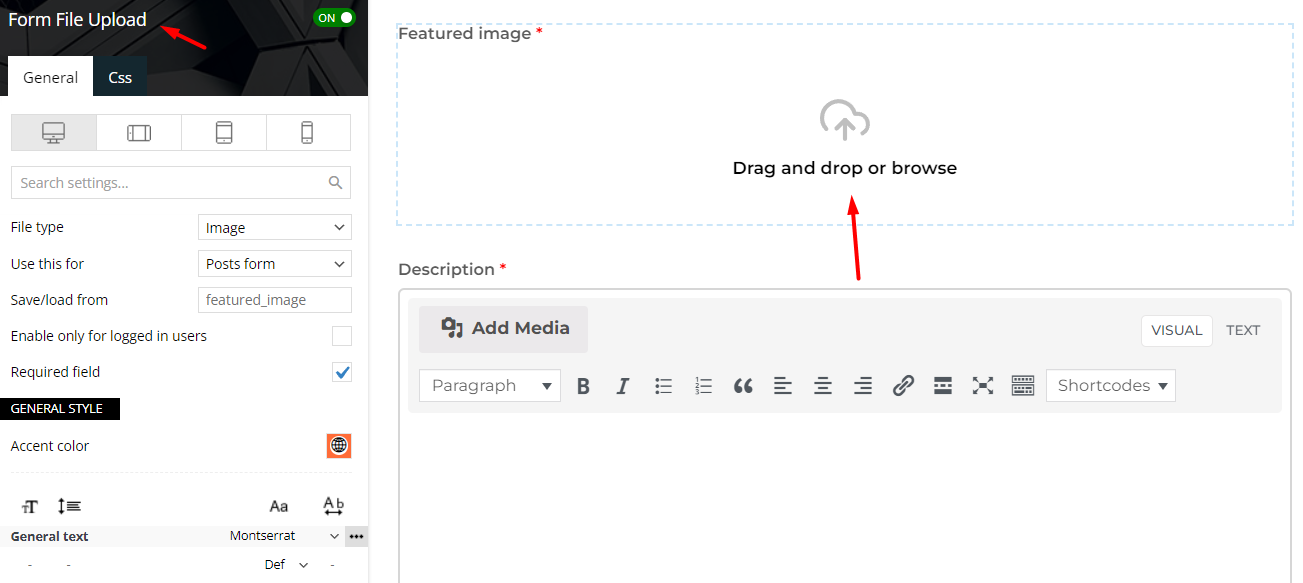
- Form File Upload: Add your featured image/any other type of file supported by WordPress.
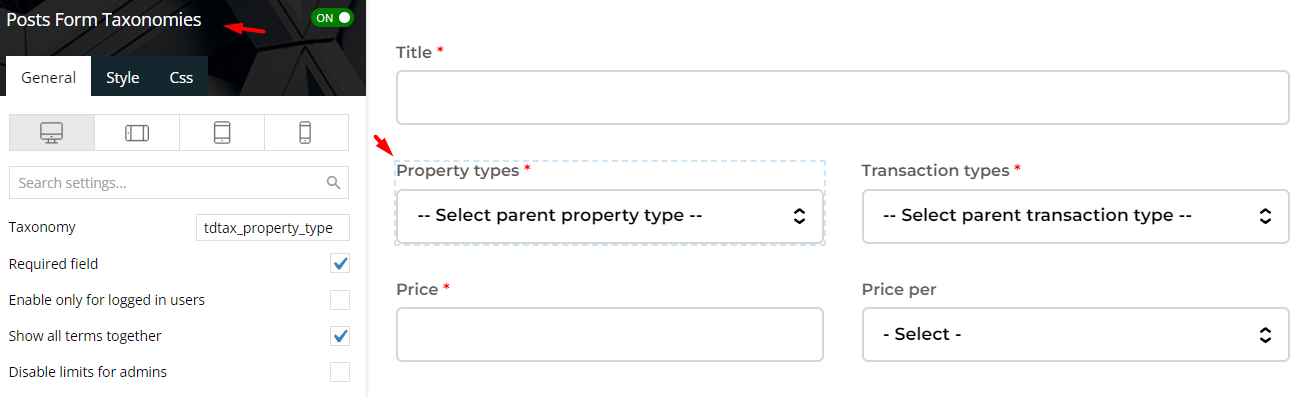
- Posts Form Taxonomies: Add, customize, and select your taxonomies in the submission form.
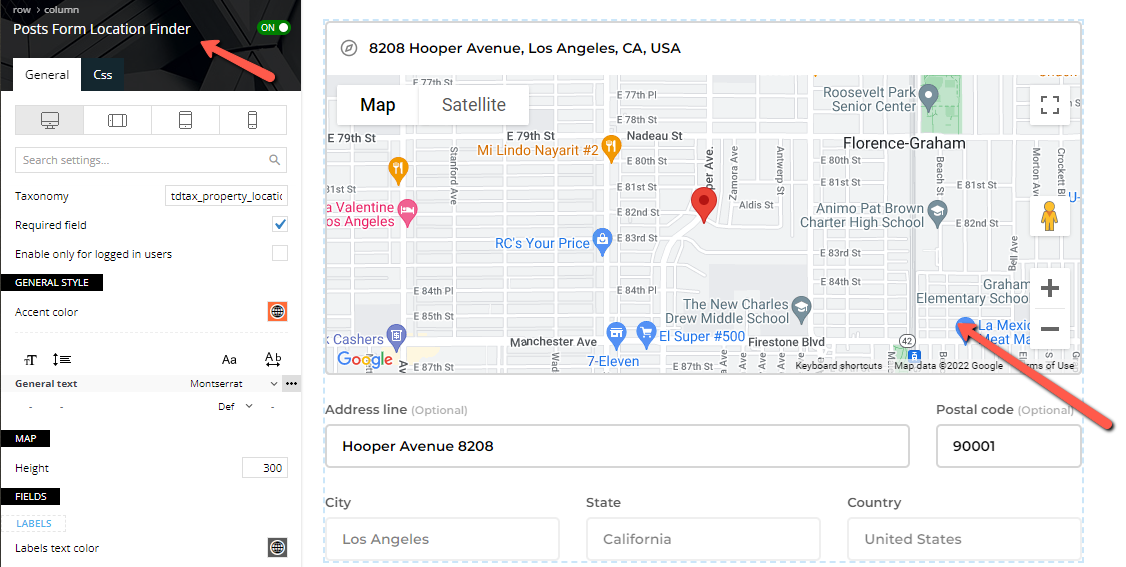
- Posts Form Location Finder: Add more information to your submission form by using the location finder, where you can specify the full address.
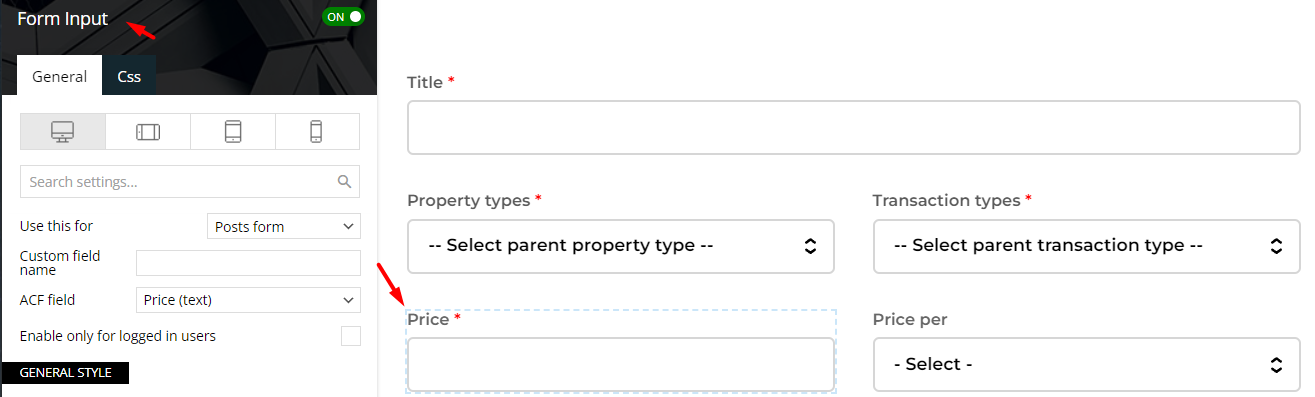
- Form Input: Add, customize, and enter the value of your ACF fields into your input from the submission form.
- Posts Form Submit: It contains a submit button with multiple functionalities.
How to set up the Frontend Submission Form
Step 1 Create your custom fields and your CPT in case you want to use this as a CPT Submission Form.
Step 2 Add the element/shortcode called “Posts Form Title” to your page.
The first label should be the title field, so your users can write a custom title for the article or a CPT that they want to submit.
Step 3 Add the element/shortcode called “Form Content” to your page.
The “Use this for” option is useful to create a post or CPT by users or to let users update their own profile information.
You can use the “Save/load from” option to specify in which field the content needs to be saved. By default, it is saved in the post content, but that can be any other custom field(ACF).
It is very important to check the “Required field” option, so you will have the field completed by users.
Step 4 Add the element/shortcode called “Form File Upload” to your page.
You need to select the “File type” from that dropdown. If you need one more for the other file, then you can simply add another element/shortcode and select the file type for that one too.
The “Use this for” option is useful to create a post or CPT by users or to let users update their own profile information.
You can use the “Save/load from” option to specify in which field the content needs to be saved. By default, it is saved in the featured image, but that can be any other custom field(ACF).
It is very important to check the “Required field” option, so you will have the field completed by users.
Step 5 Add the element/shortcode called “Posts Form Taxonomies” to your page(optional).
This field can be required or optional in your submission form. This element/shortcode is useful if you want to display a list of your custom taxonomies that you want the user to choose from to be more specific in their posts/CPTs.
Step 6 Add the element/shortcode called “Posts Form Location Finder” to your page(optional).
This element/shortcode is useful if you want to display a map and some helpful fields about the address to point out the right location. In the form, users can search for a street name and/or a number. After you find the right address, the helpful fields will be automatically completed.
Step 7 Add the element/shortcode called “Form Input” to your page.
You can add your custom fields and personalize your form. If you want to add 2 custom fields, then you need to add the element twice. The custom fields created will be seen in that dropdown ACF field.
Step 8 Add the last and important element/shortcode called “Posts Form Submit” to your page.
For the submission form, we need to enable the part that creates the post of the element/shortcode. In the “post type” field, you can add posts or CPTs.
You can use the “Custom title field name” option to specify from which field the post title needs to be saved.
From the “Post Publish Status” dropdown, you can choose how you want to save the post/CPT that a user submits.
The “Link it to the current post” option is useful when you insert the form in a single or CPT cloud template. When the user submits the new post/CPT, it will be linked to the current post/CPT.
You can redirect the users to a custom page after they successfully submit the form by specifying the page URL in the “Redirect if successful” option field.

Note! For the section “Add new posts limit,” there you can choose where to apply the limit (shortcode or plan). You can apply it directly from this shortcode/element called “Posts Form Submit” or from the Opt-in builder -> Subscriptions -> Plans -> Edit plan (more information can be found here).