
A new possibility has been added to our theme. A page on a website that allows users to communicate with the site owner. The contact form provides an immediate, convenient way for users to ask or address a question with more details and more customizable fields. These fields can be easily created using the ACF(Advanced Custom Fields) plugin. Read more about how you can create your field group in this guide: https://forum.tagdiv.com/custom-fields-support/
The functionalities of this form are embedded into some custom form shortcodes in the TagDiv Composer:
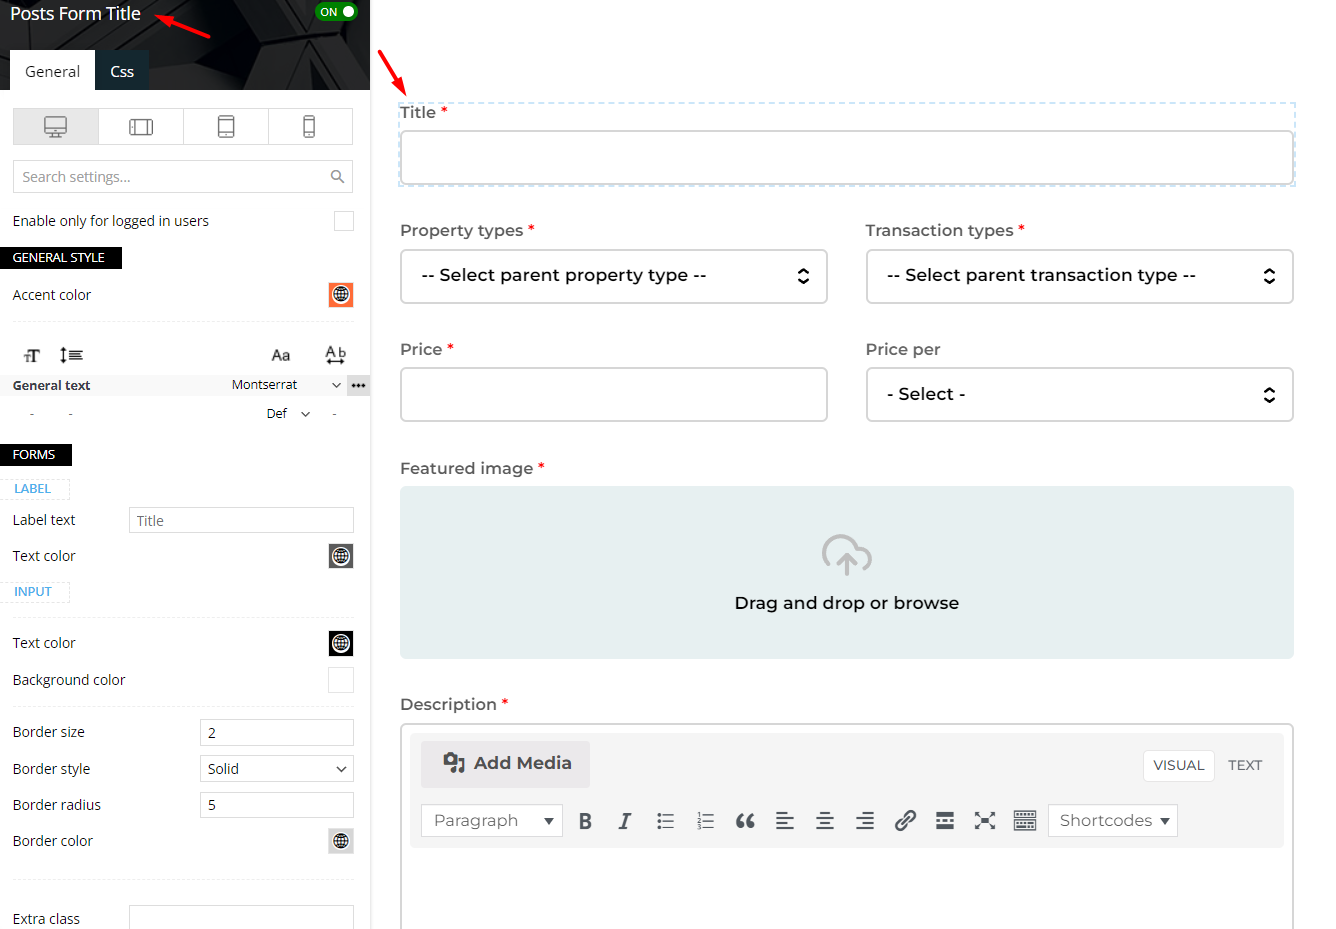
- Posts Form Title: Customize the title (h2) in the body of the email.
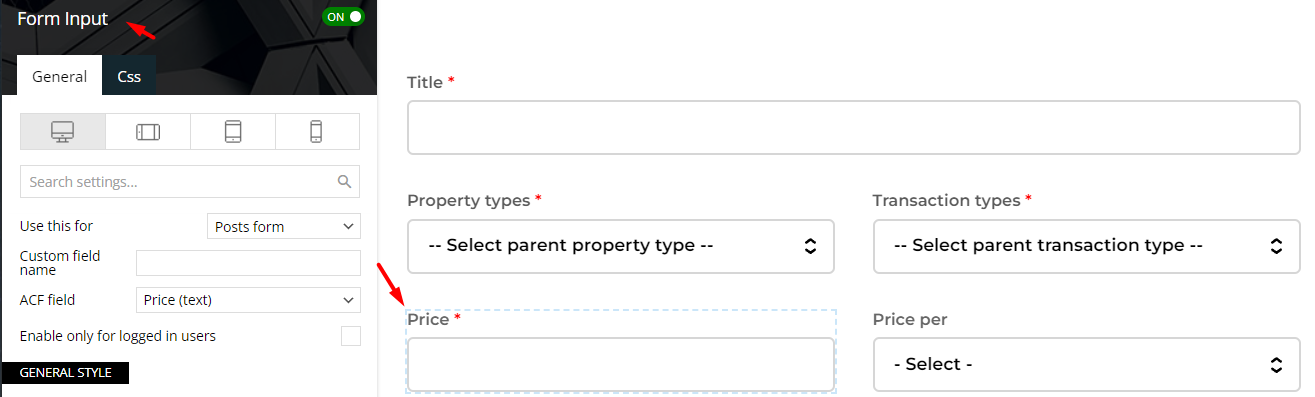
- Form Input: Add, customize, and enter the value of your ACF fields into your input from the form.
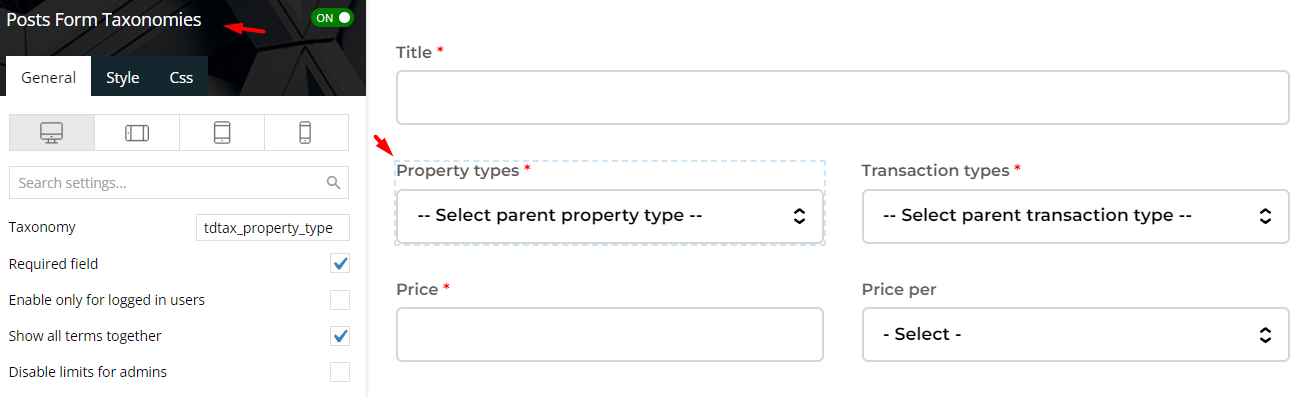
- Posts Form Taxonomies: Add, customize, and select your taxonomies in your form.
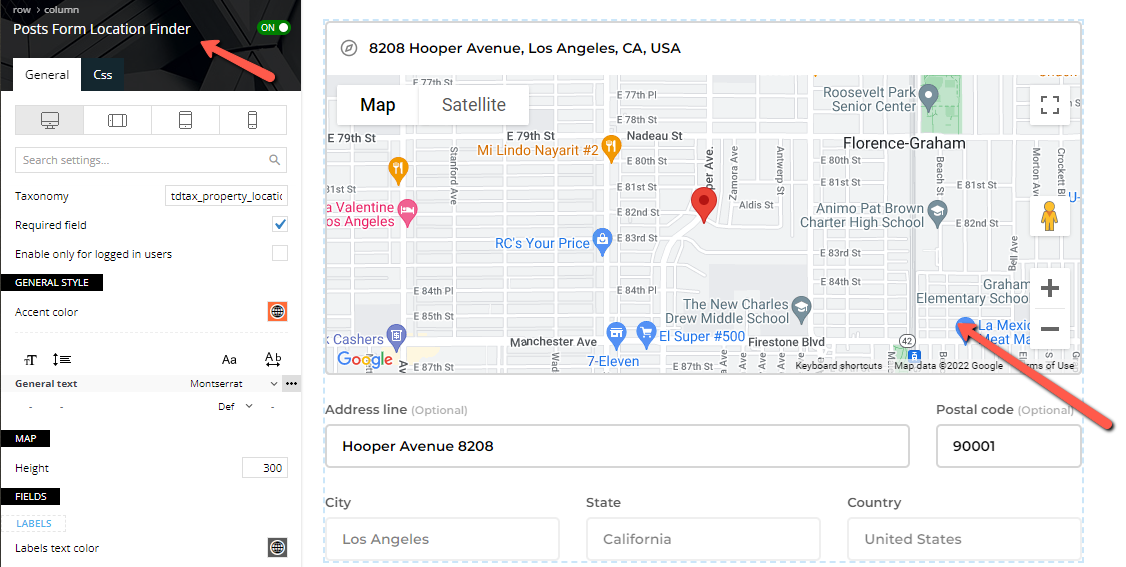
- Posts Form Location Finder: Add more information to your form by using the location finder, where you can specify the full address.
- Posts Form Submit: It contains a submit button with multiple functionalities.
How to set up the Form Contact Page
Step 1 Create your custom fields.
Step 2 Add the element/shortcode called “Posts Form Title” to your page.
The first label in a form should be the title field, so your users can write a custom title in the body of the email sent to you(the site owner).
Step 3 Add the element/shortcode called “Posts Form Taxonomies” to your page(optional).
This field can be required or optional in your contact form. This element/shortcode is useful if you want to display a list of your custom taxonomies that you want the user to choose from to be more specific in their email.
Step 4 Add the element/shortcode called “Posts Form Location Finder” to your page(optional).
This element/shortcode is useful if you want to display a map and some helpful fields about the address to point out the right location. In the form, users can search for a street name and/or a number. After you find the right address, the helpful fields will be automatically completed.
Step 5 Add the element/shortcode called “Form Input” to your page. You can add your custom fields and personalize your form. If you want to add 2 custom fields, then you need to add the element twice. The custom fields created will be seen in that dropdown ACF field.
The result of the above customization can be seen here:
Step 6 Add the last and important element/shortcode called “Posts Form Submit” to your page.
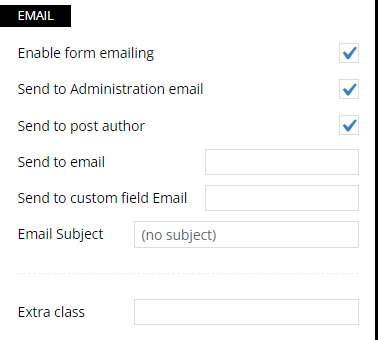
For the contact page form, we need to enable the part with emailing of the element/shortcode. By default, these are the settings, and the email will be sent to the site administrator and to the logged in user that is sending the email.
You can add one more email address in the “Send to email” field by writing the email there.
“Send to custom field email” is useful if you have a custom field with an email address in it and you can write in that field the name of the custom field you created. So, the email will also be sent to the email address from your custom field.
Complete the email subject, which will appear first in your email.
