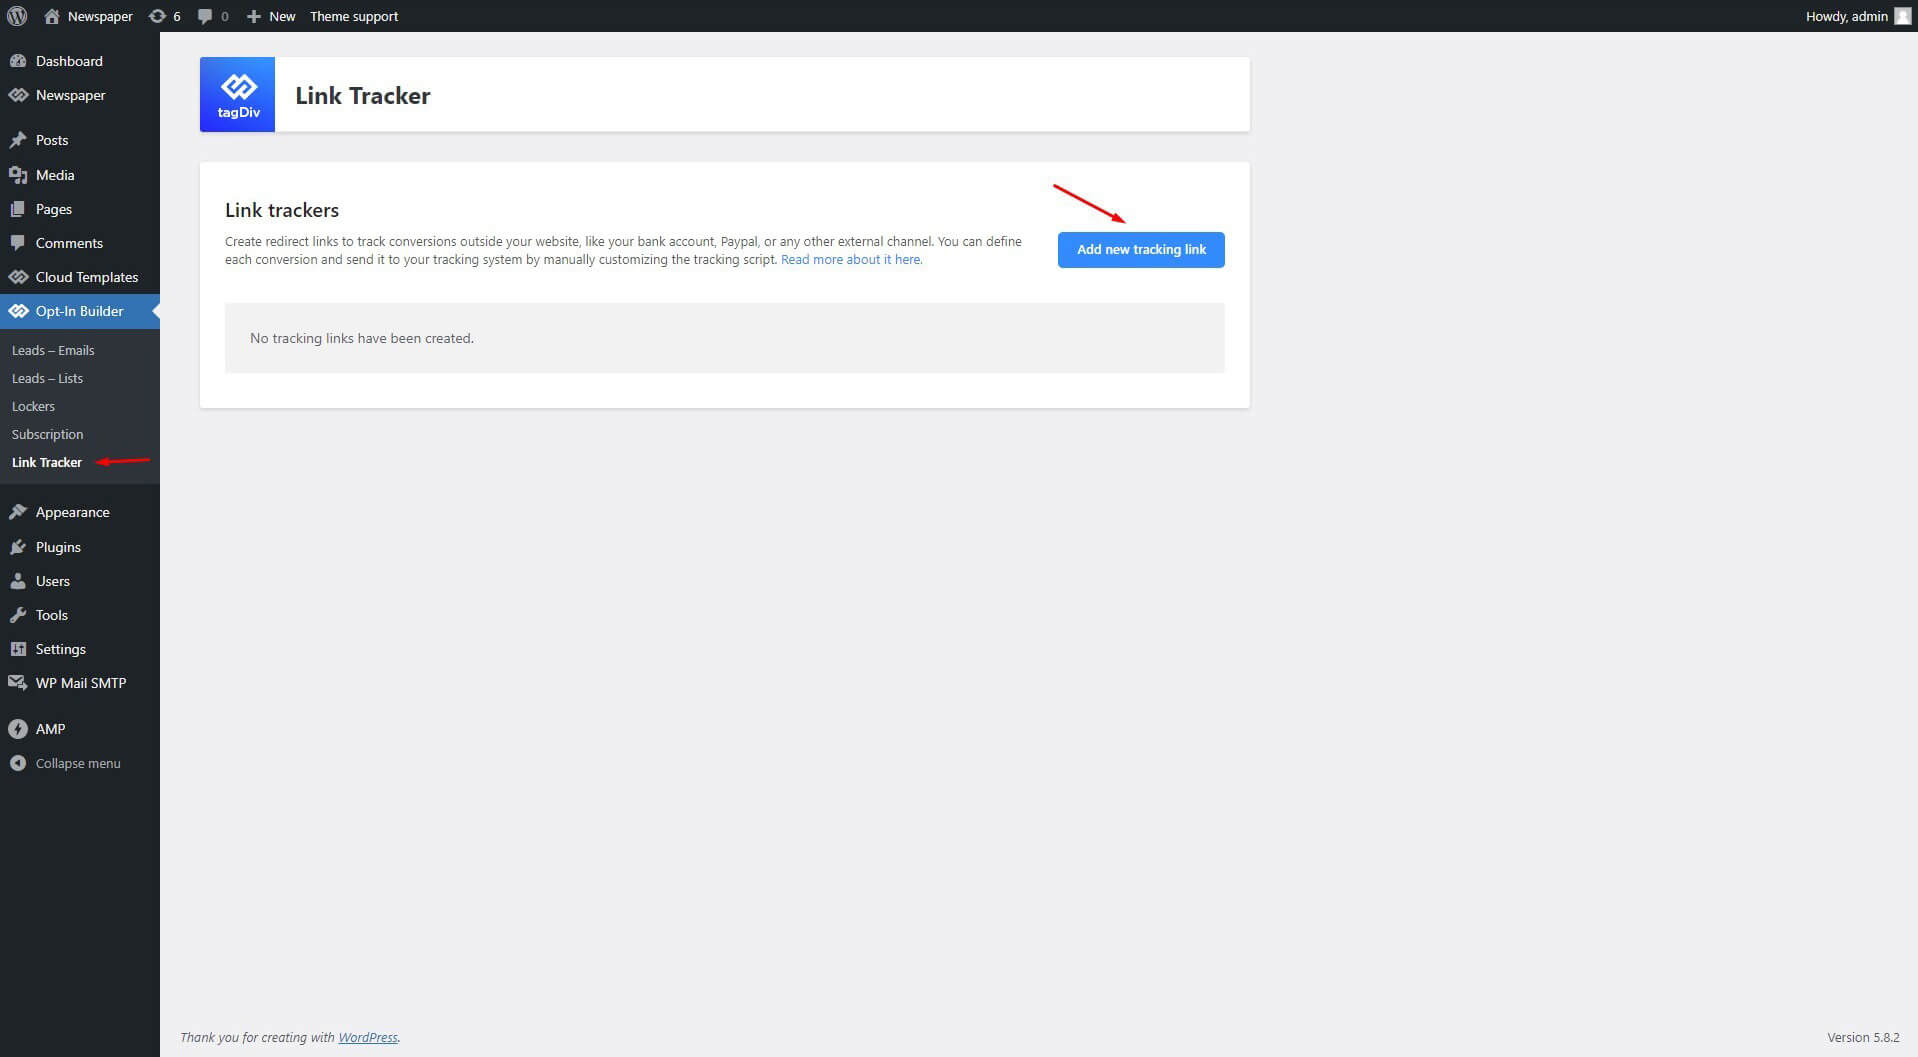
The tagDiv Opt-In Builder comes with a possibility to build custom tracking links within the Newspaper theme. You can create redirect links to track conversions outside your site, such as your Bank Account, PayPal account, or any other external channel. You can define each conversion and send it to your tracking system by manually customizing the tracking script.

How the Link Tracker Works
The Link Tracker is an option that allows you to create custom tracking links that sends data to your tracking system. For this example we are using Google Analytics to track conversions that take place in PayPal. This is a cookie-based ecommerce event. This type of event sends data only once, the first time it is executed creating a unique event then redirects to the destination link (in our example, the PayPal invoice). Once the date is sent to Google Analytics API, even if the link is clicked multiple times it will ignore the new clicks, avoiding duplicating data in your Google Analytics account.
The Anatomy of the event:
- We’ve created a special type of event that combines the event characteristics with the ones that are specific for eCommerce products.
'event', // Sends your conversion as an Event with the "ecommerce" "category" in your GA events reports
 'purchase', // Specifies the "action" of the event
 {
 'event_label': 'NAMEIT', // This is the "label" of the event. You can rename. (e.g. Plan2)
 'transaction_id': 'INVOICE NUMBER', // This is the ID of conversion. (e.g. 634)
 'value': XXX.00, // Specifies the total revenue or grand total associated with the transaction (e.g. 11.99)
 'currency': "XXX", // Local currency code. (e.g USD)
 'tax': 0.0, // Specifies the total shipping cost of the transaction. (e.g. 5)
 'shipping': 0, // Specifies the total tax of the transaction. (e.g. 1.29)
Further reference on Events, your can find on Google Analytics documentation.
2. Next, the second part of the HTML code send the transaction details to your Google Analytics account.
"items": [
 {
 "id": "YourPlanID", // Transaction ID. For this specific case it's SKU. Required.
 "name": "NameIt", // Product name. Required.
 "quantity": XX, // Quantity. Required.
 "price": "XX.0" // Price per Unit. Required.
 }]
Further reference on Ecommerce transactions your can find on Google Analytics documentation.
You can find this second set of data on Product Performance report in your Google Analytics account.
3. The last part of the code makes the redirect request to the destination link after it receives a response from Google Analytics API. This is required.
 'event_callback': function() {
 redirect(1000);
 }

How to create a customized link to track conversions
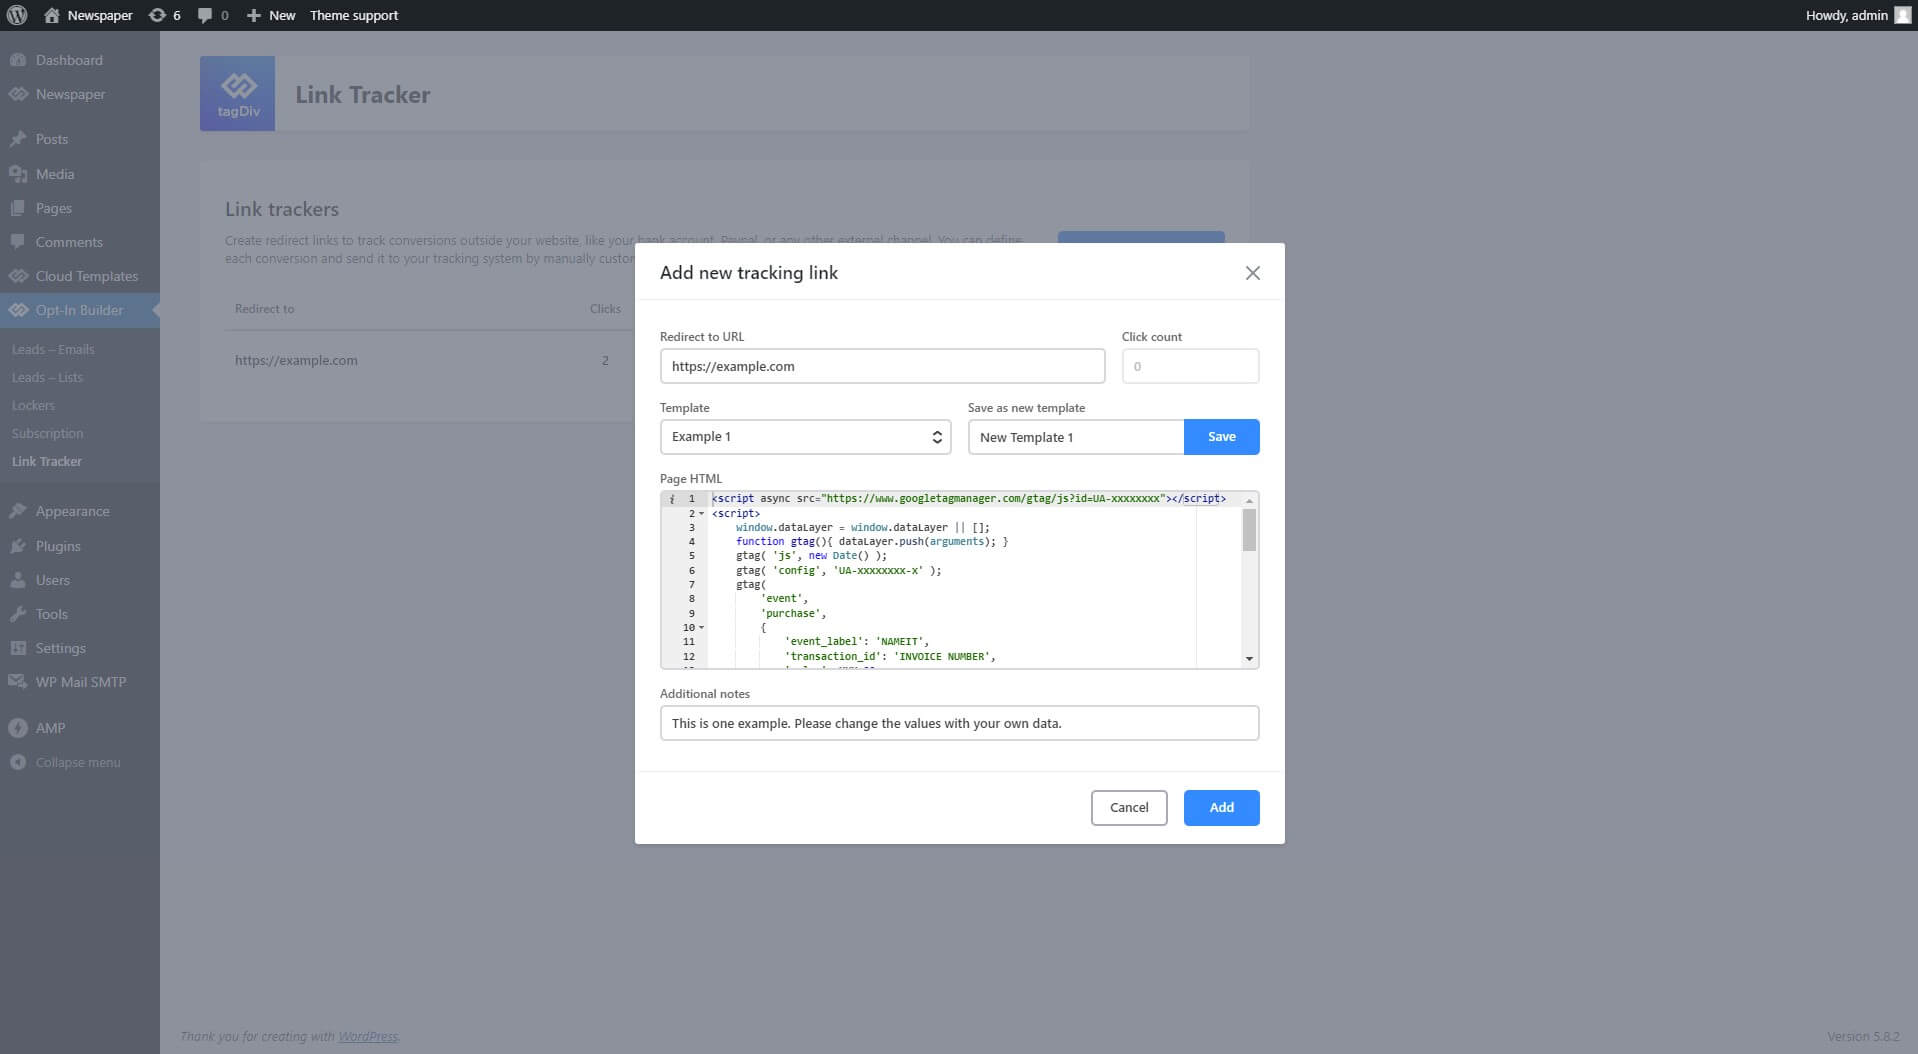
Go to tagDiv Opt-In Builder > Link Tracker and add the following information:
- Enter the URL you would like to make the redirect to.
- Give your new template a name
- Paste your HTML script and customize it by changing the transaction id, value, and so on.
- If you have already saved many script templates, choose the needed one from the Page HTML Saved Templates dropdown and customize it.
- Save it for later usage
- Write a note if you want to show something specific in the Link Tracker dashboard to help you identify the specific links.
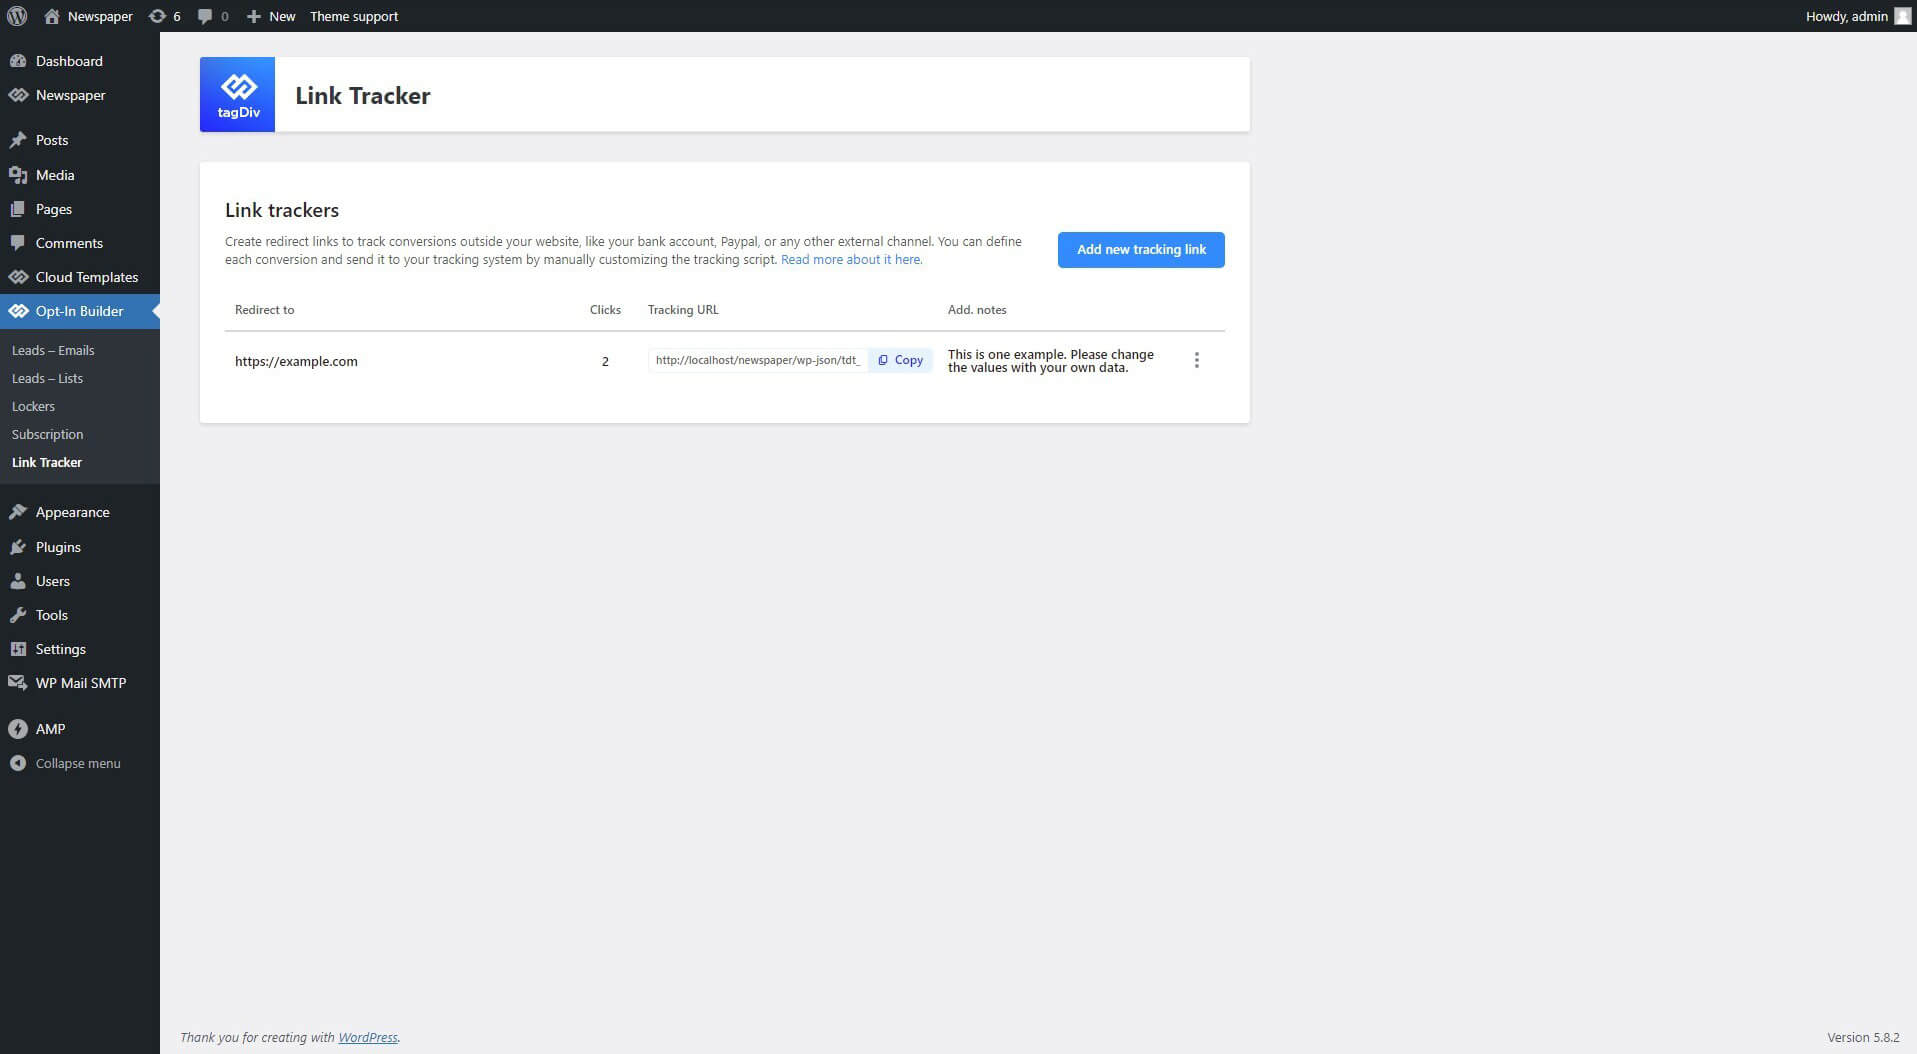
- Copy the link and send it to your customer

- Create as many tracking codes as you want.
- Save your HTML script as a template, so you can use it later.
- From the Link Tracker dashboard you can see the clicks count, view, edit, or delete your script template.
You can use this code as a reference:
<script async src="https://www.googletagmanager.com/gtag/js?id=UA-xxxxxxxx"></script>
<script>
 window.dataLayer = window.dataLayer || [];
 function gtag(){ dataLayer.push(arguments); }
 gtag( 'js', new Date() );
 gtag( 'config', 'UA-xxxxxxxx-x' );
 gtag(
 'event',
 'purchase',
 {
 'event_label': 'NAMEIT',
 'transaction_id': 'INVOICE NUMBER',
 'value': XXX.00,
 'currency': "XXX",
 'tax': 0.0,
 'shipping': 0,
 "items": [
 {
 "id": "Your Plan ID",
 "name": "NameIt",
 "quantity": XX,
 "price": "XX.0"
 },
 {
 "id": "Your Plan ID1",
 "name": "NameIt1",
 "quantity": XX,
 "price": "XX.0"
 },
 ],
 'event_callback': function() {
 redirect(1000);
 }
 }
 );
</script>


