Headers are the first part of your website seen by a visitor. It’s vital because a header is where you add your brand identity, good navigation, and messages about a site’s core intent. Newspaper comes with a new way to customize your header right on the front-end with the Header Builder.
With this feature, you can have different Headers for every page or post of your website. Newspaper theme is loaded with over 100 pre-designed header templates, with different styles and looks.
In order to use the Header Builder, you should know the tagDiv Composer basic functionality so please learn how to use the tagDiv Composer first.
How to Create a New Header with the Header Builder?
Headers can be created on any page or post. The steps bellow show you how to create a new header on the homepage by using one Header template from the tagDiv Cloud Library. Please note that this method is used for creating and assigning new headers on all page types or single posts.
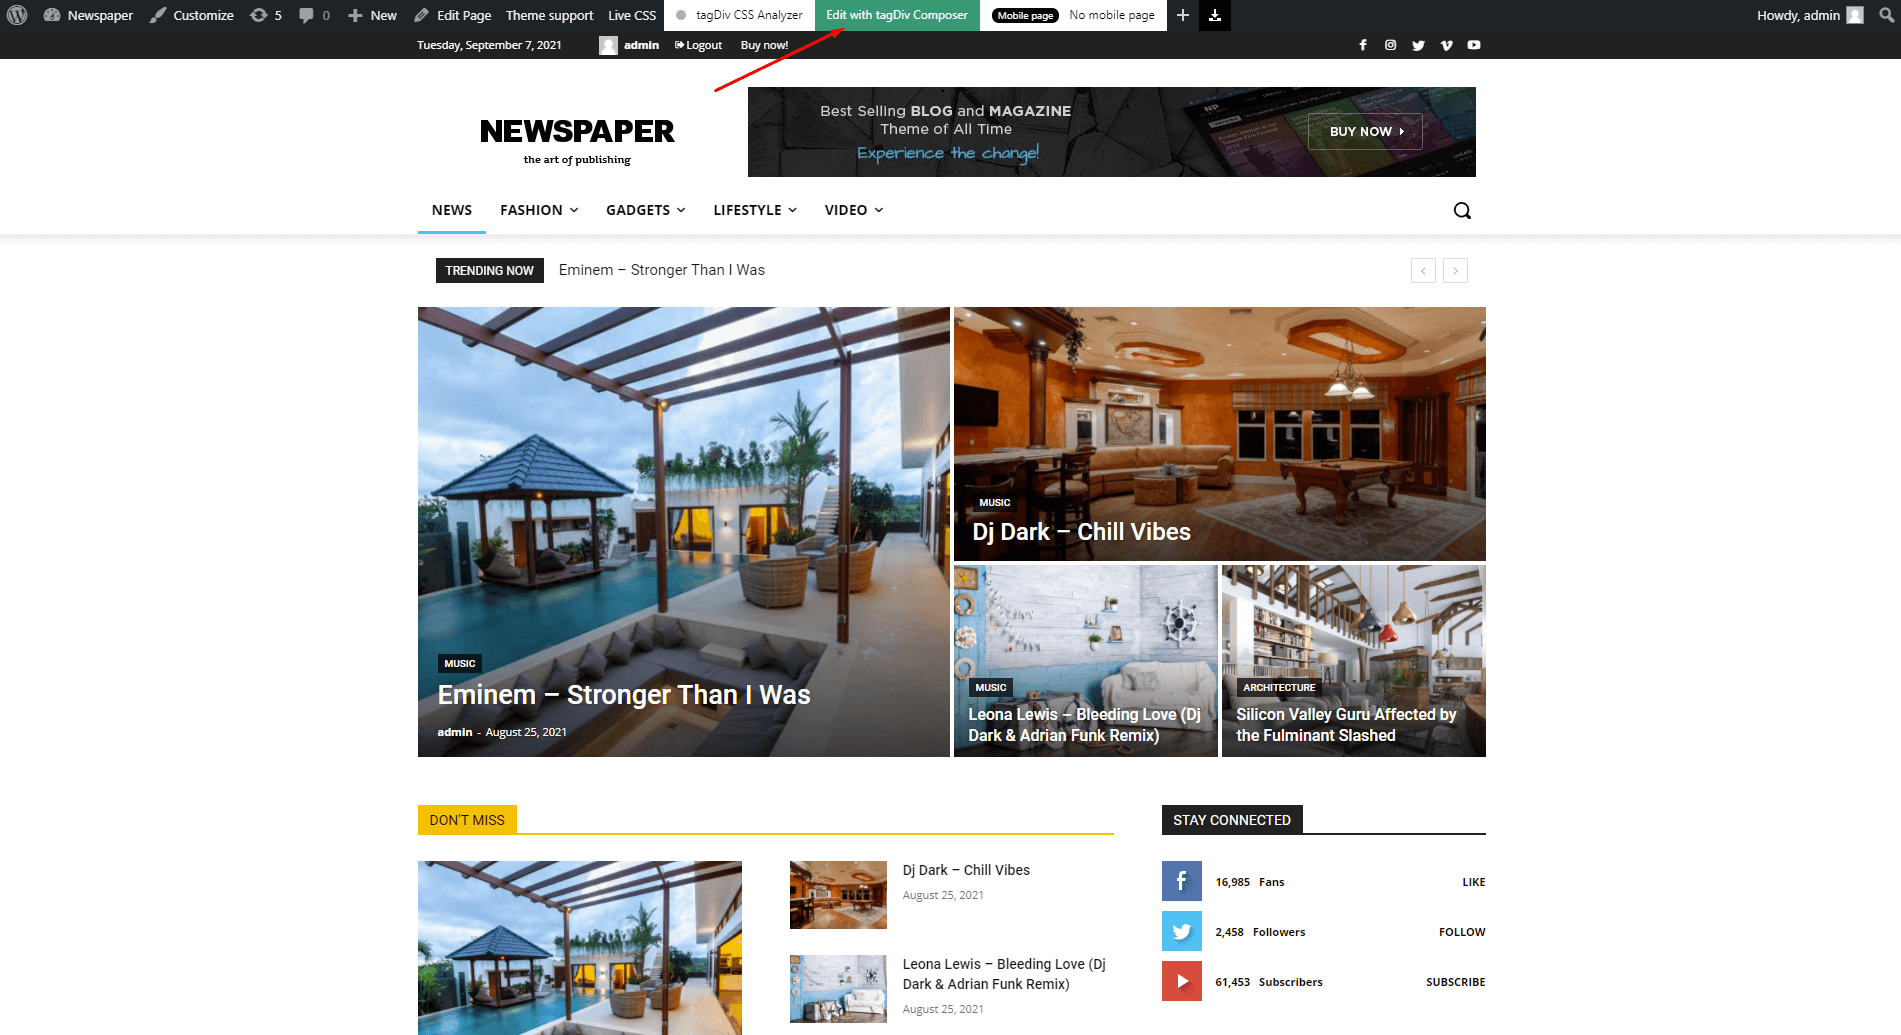
Step 1 – View the homepage of your site on the frontend. Click on the Edit with tagDiv Composer tab.
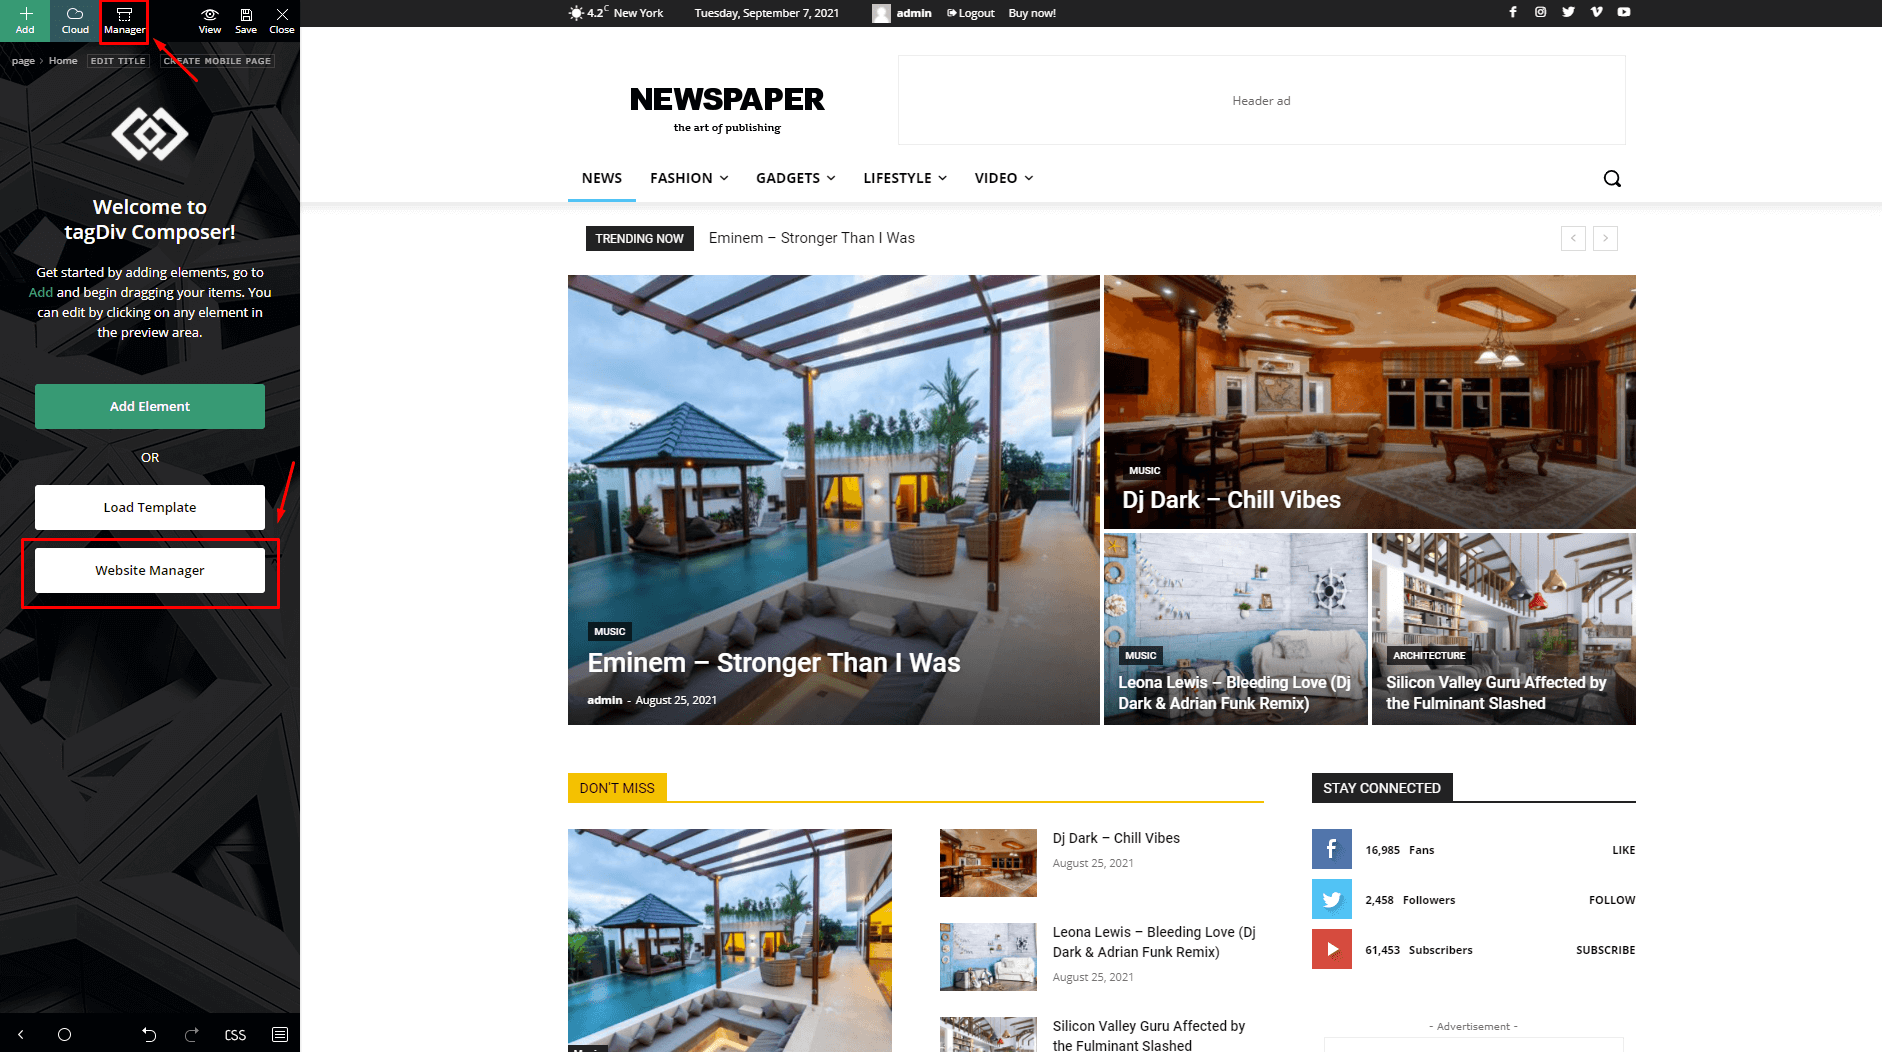
Step 2 – Once the page builder is loaded, Click on the Manager icon located in the upper left corner or on the Website Manager button.
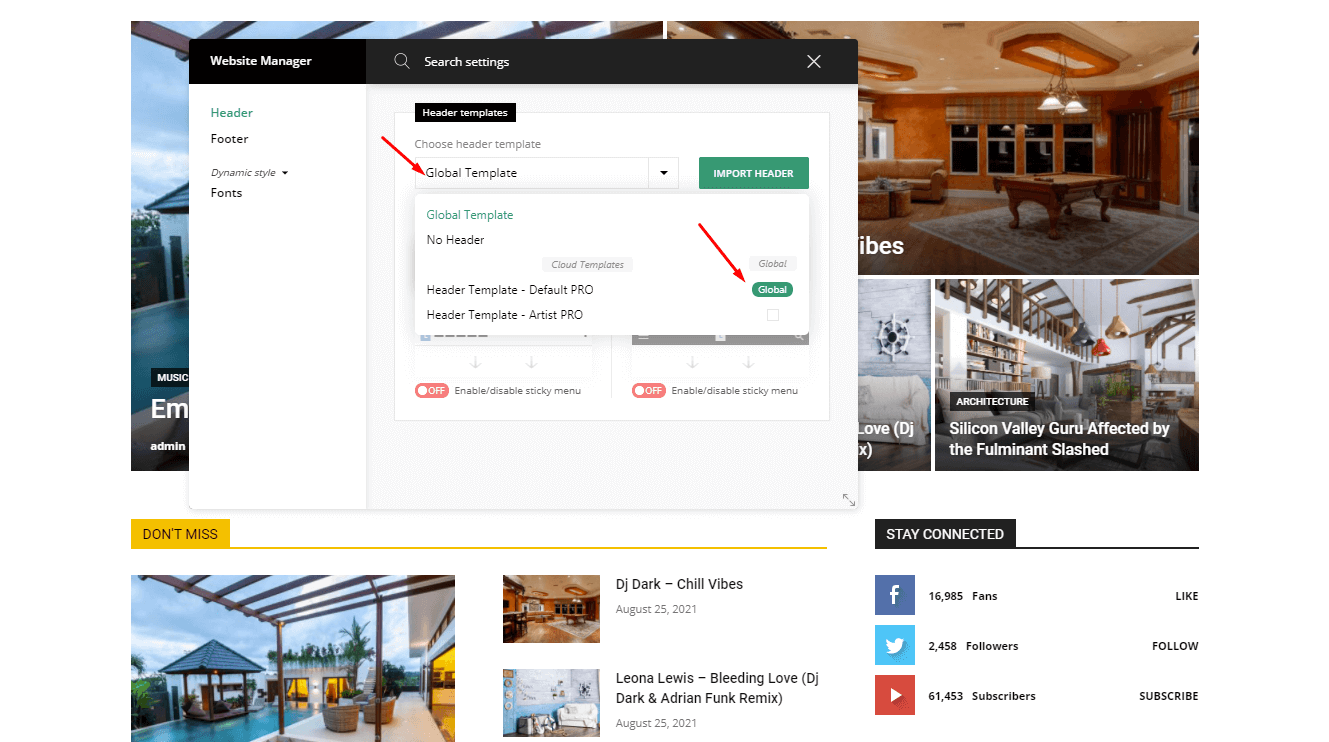
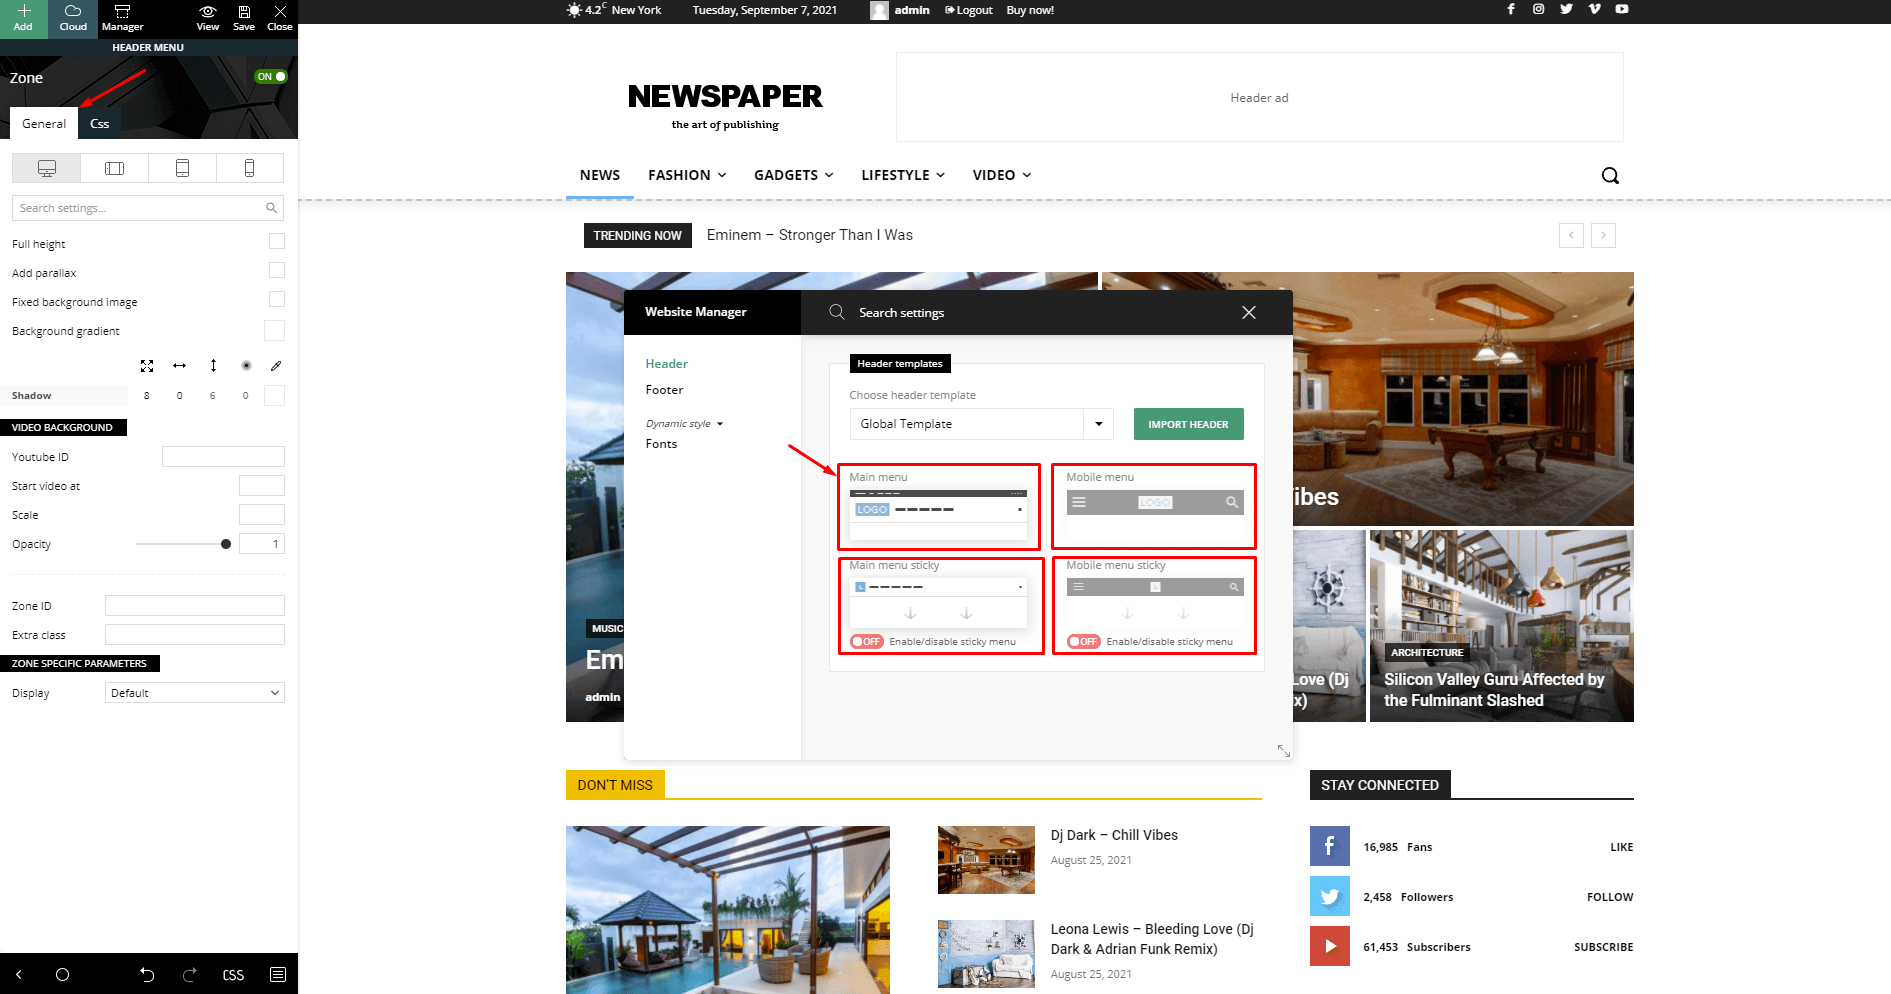
Step 3 – After clicking on the Website Manager button or icon, an info box will show up. Here you can see all the imported header templates. Also, you can set whatever Header template you want as global on the whole website.
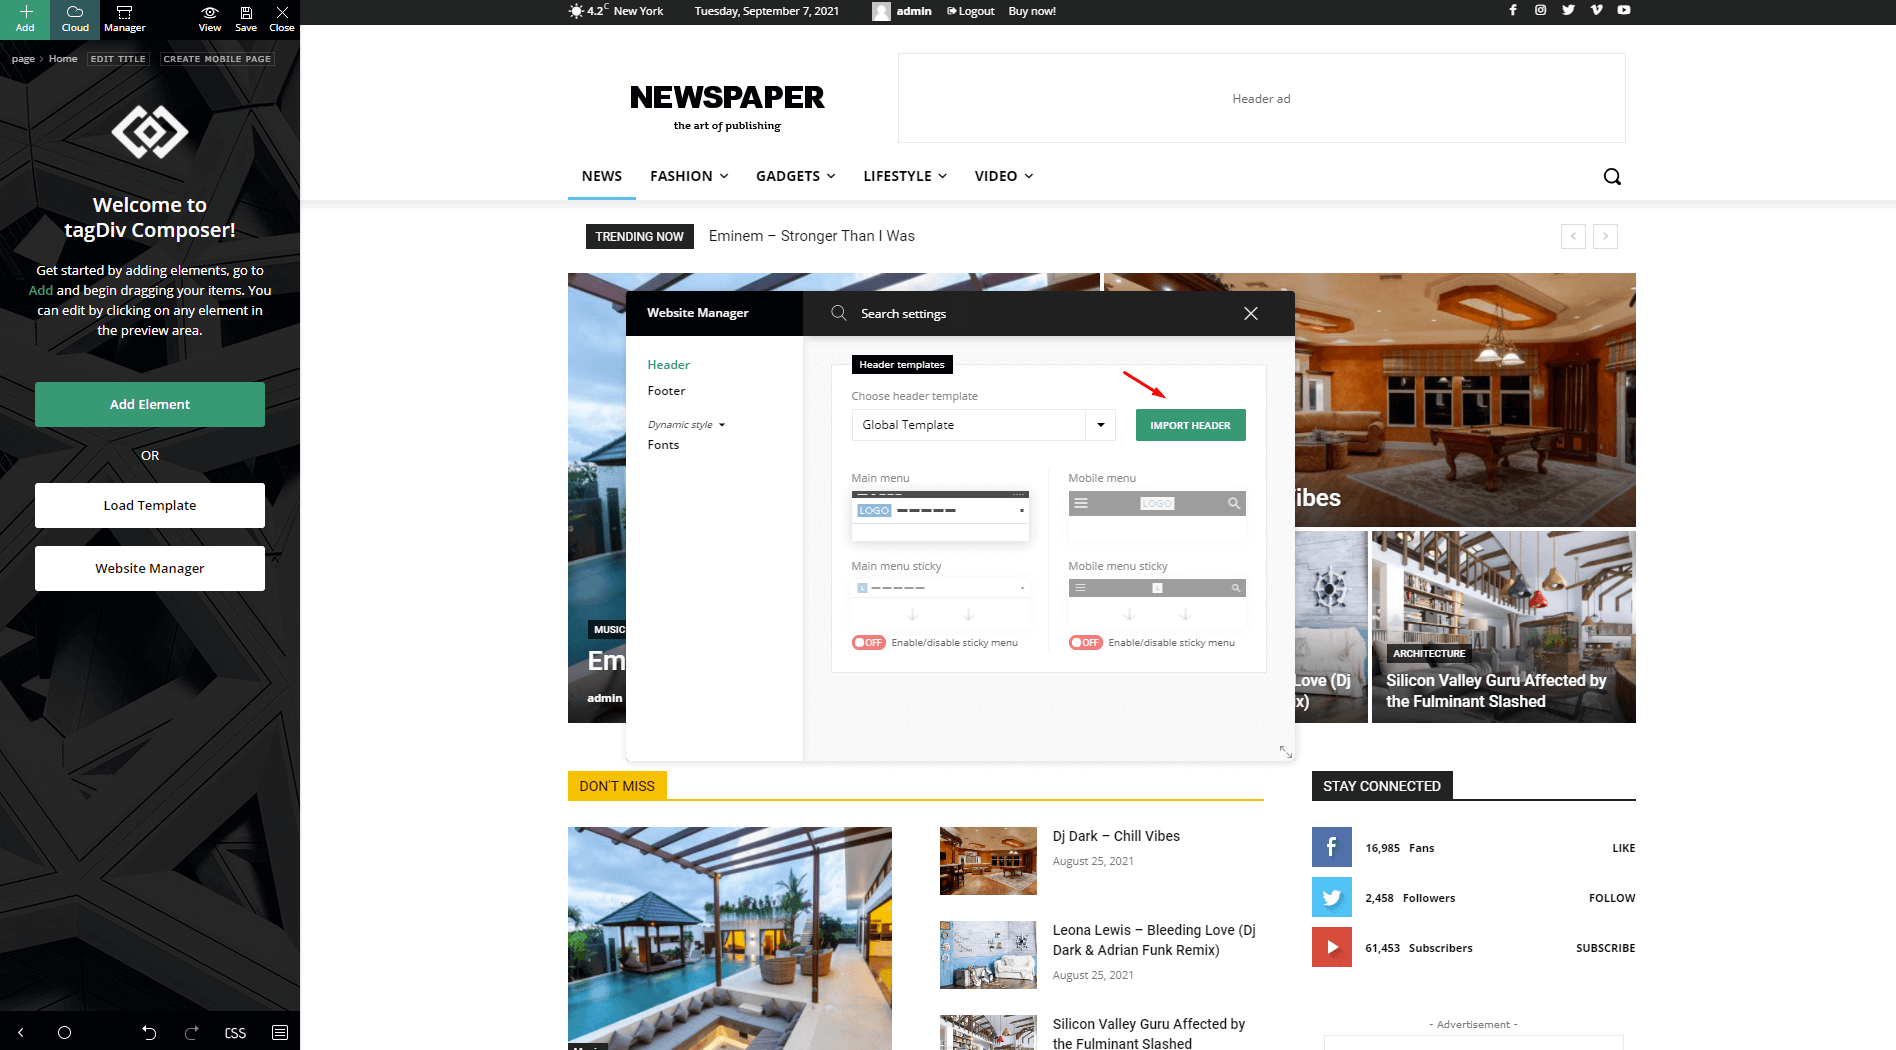
Step 4 – From the Website Manager box you can easily click on the Import Header button to install a new header template.
Step 5 – After clicking on the Import Header button, the tagDiv Cloud Library opens and you can choose your preferred pre-designed header template.
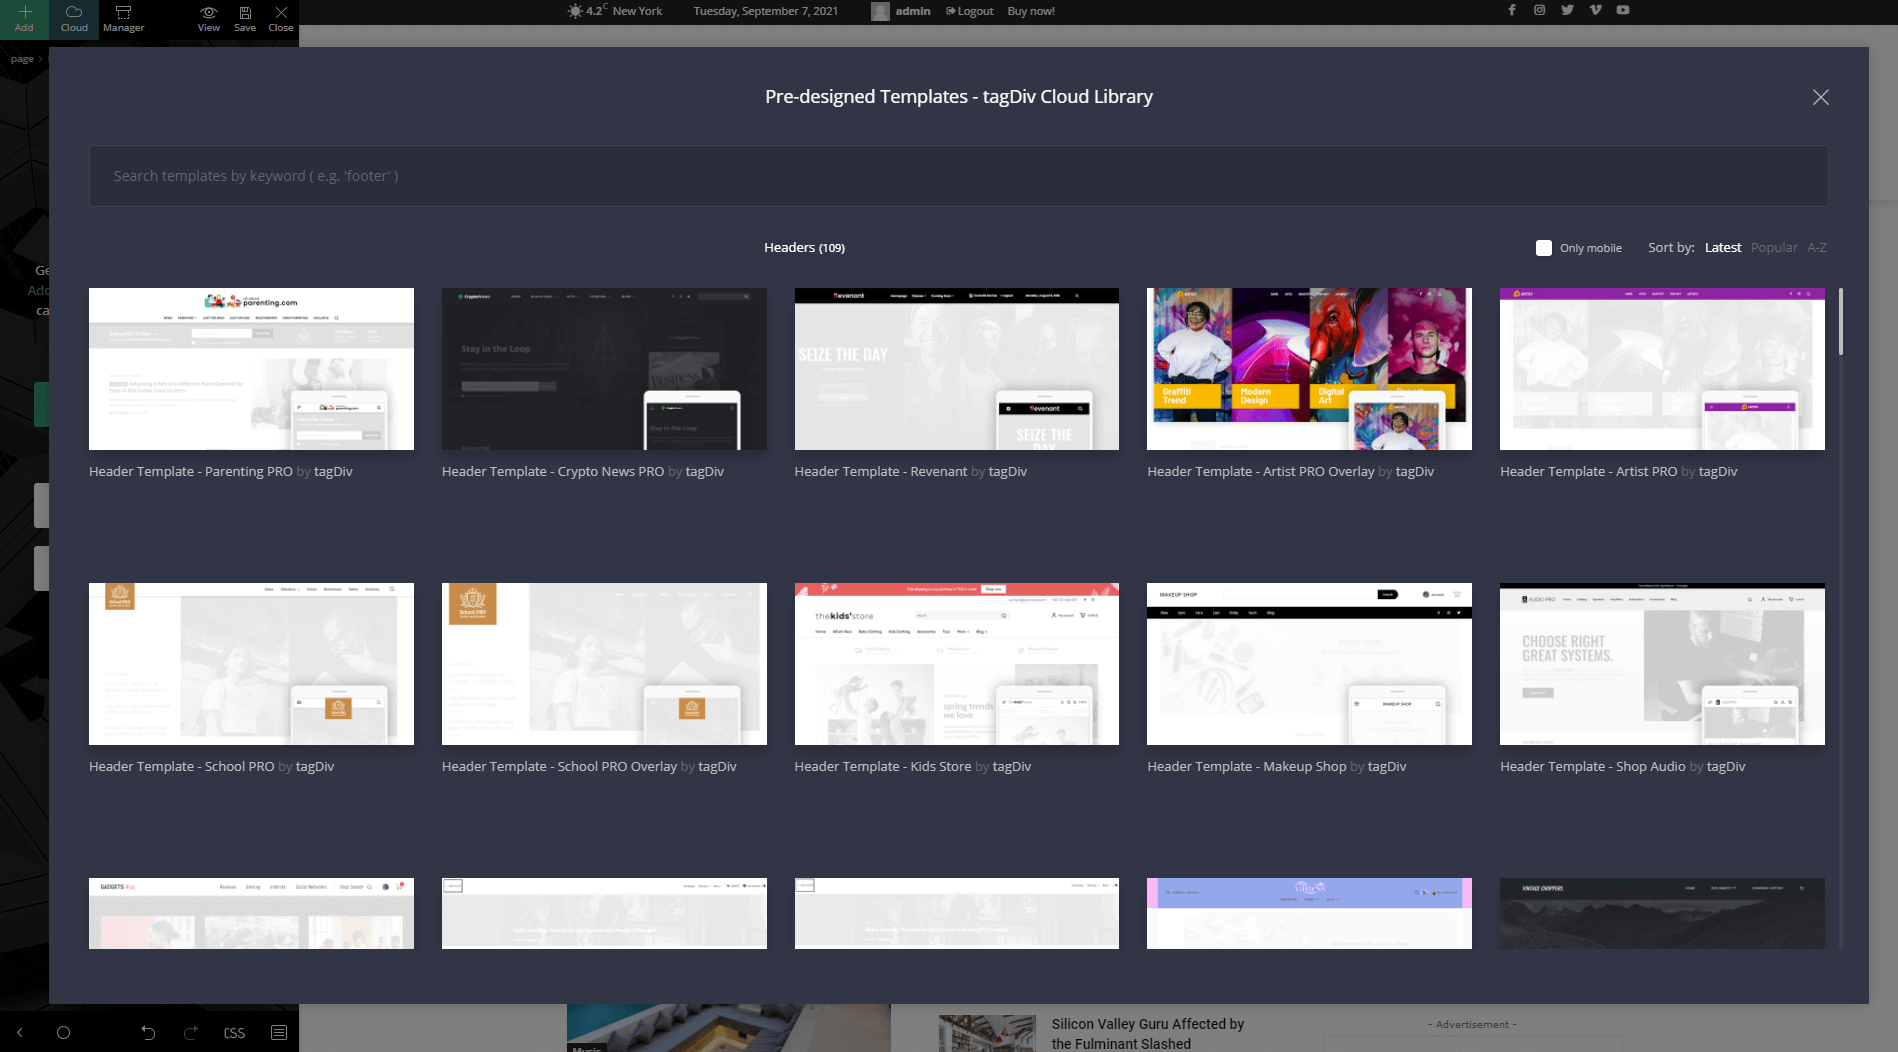
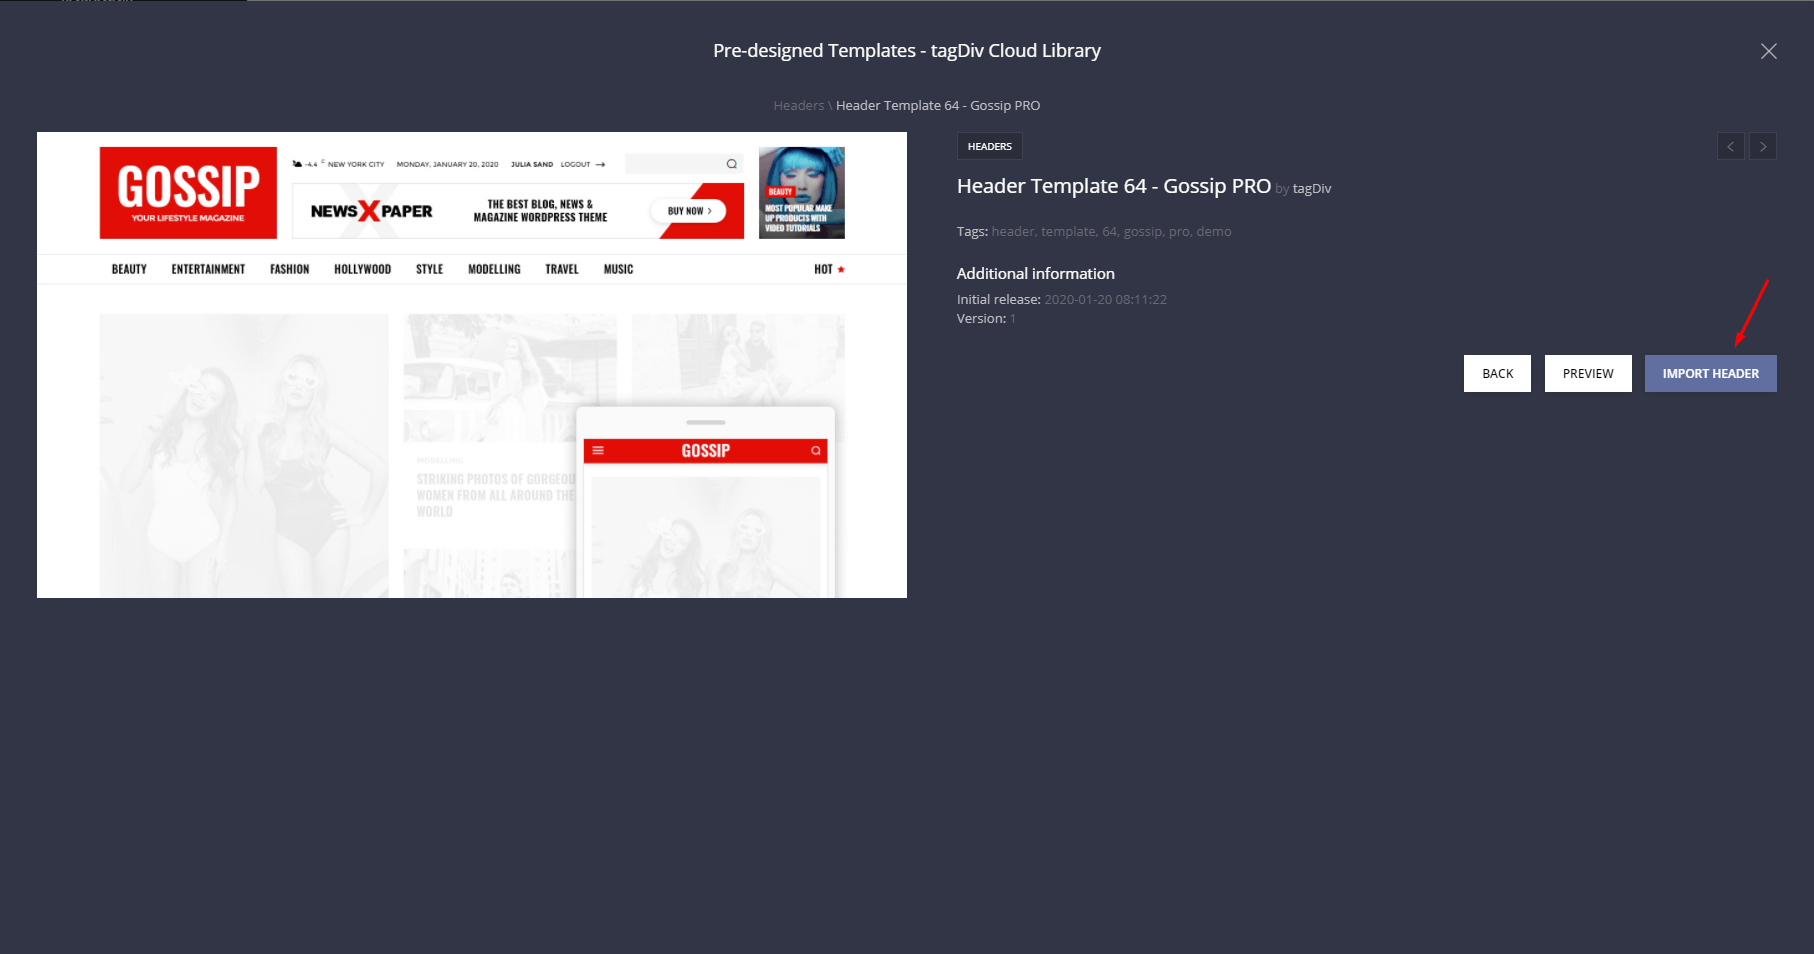
Step 6 – Click on the header template you would like to use and click on the Import Header button. Also, before the import is complete, a pop-up message will ask you if you’re sure to import this template. Hit the OK button if you’re ready, and then click on Done!
Step 7 – The Website Manager allows you to customize the header section per areas: main menu, mobile menu, main menu sticky, and mobile menu sticky. In this case, we’ll show you how to modify the Main Menu. Click on the Main Menu icon and the Header Menu will open-up in tagDiv Composer.
Add or remove content from each zone in order to show or remove specific elements from your header.
- Main menu – handles the standard desktop header.
- Main menu sticky – handles the desktop sticky header section. If you do not need a sticky header, simply delete all content from this zone.
- Mobile menu- handles the standard mobile header.
- Mobile menu sticky – handles the mobile sticky header section. If you do not need a sticky header for mobiles, simply delete all content from this zone.
By clicking on each menu section lets you see how they look like on your website.
If you don’t want not want the menus to become sticky while the visitor is scrolling, you just have to switch the On/Off buttons for Main menu and also for Mobile Menu.
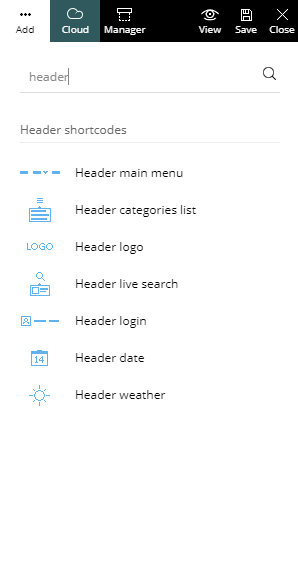
Step 8 – To customize your new header, you can use all elements available in the tagDiv Composer, including the specific header shortcodes created specially for the Header Builder.
What if you want to have different headers on different parts of your site?
In this case, you can go to a category page for example and edit the Header Template (by following the steps from above). Do not assign the header template as Global and you’re done. The chosen category page has a different header than the homepage. You can do this for any page or single post.
Conclusions
Having seen the 4 zones of the Header Builder, you’re now ready to tackle making the Header for each one by yourself! Start small, with simple elements and ideas then think bold and grow your design through it.
Create amazing layouts for your site and choose the one you want to show on each template in particular. The new Header Builder allows infinite possibilities to style your website.


